Viewing Condensed info mobile device app

Full website is best viewed from PC
OR
select "Request Desktop"
from you mobile device's toolbar
Your basket is empty

Filtered by tag ('custom sheet metal')

Hot Rod 38 Plymouth custom panel fabrication

 by kustombitz on 04 Dec 2018 |
No Comment
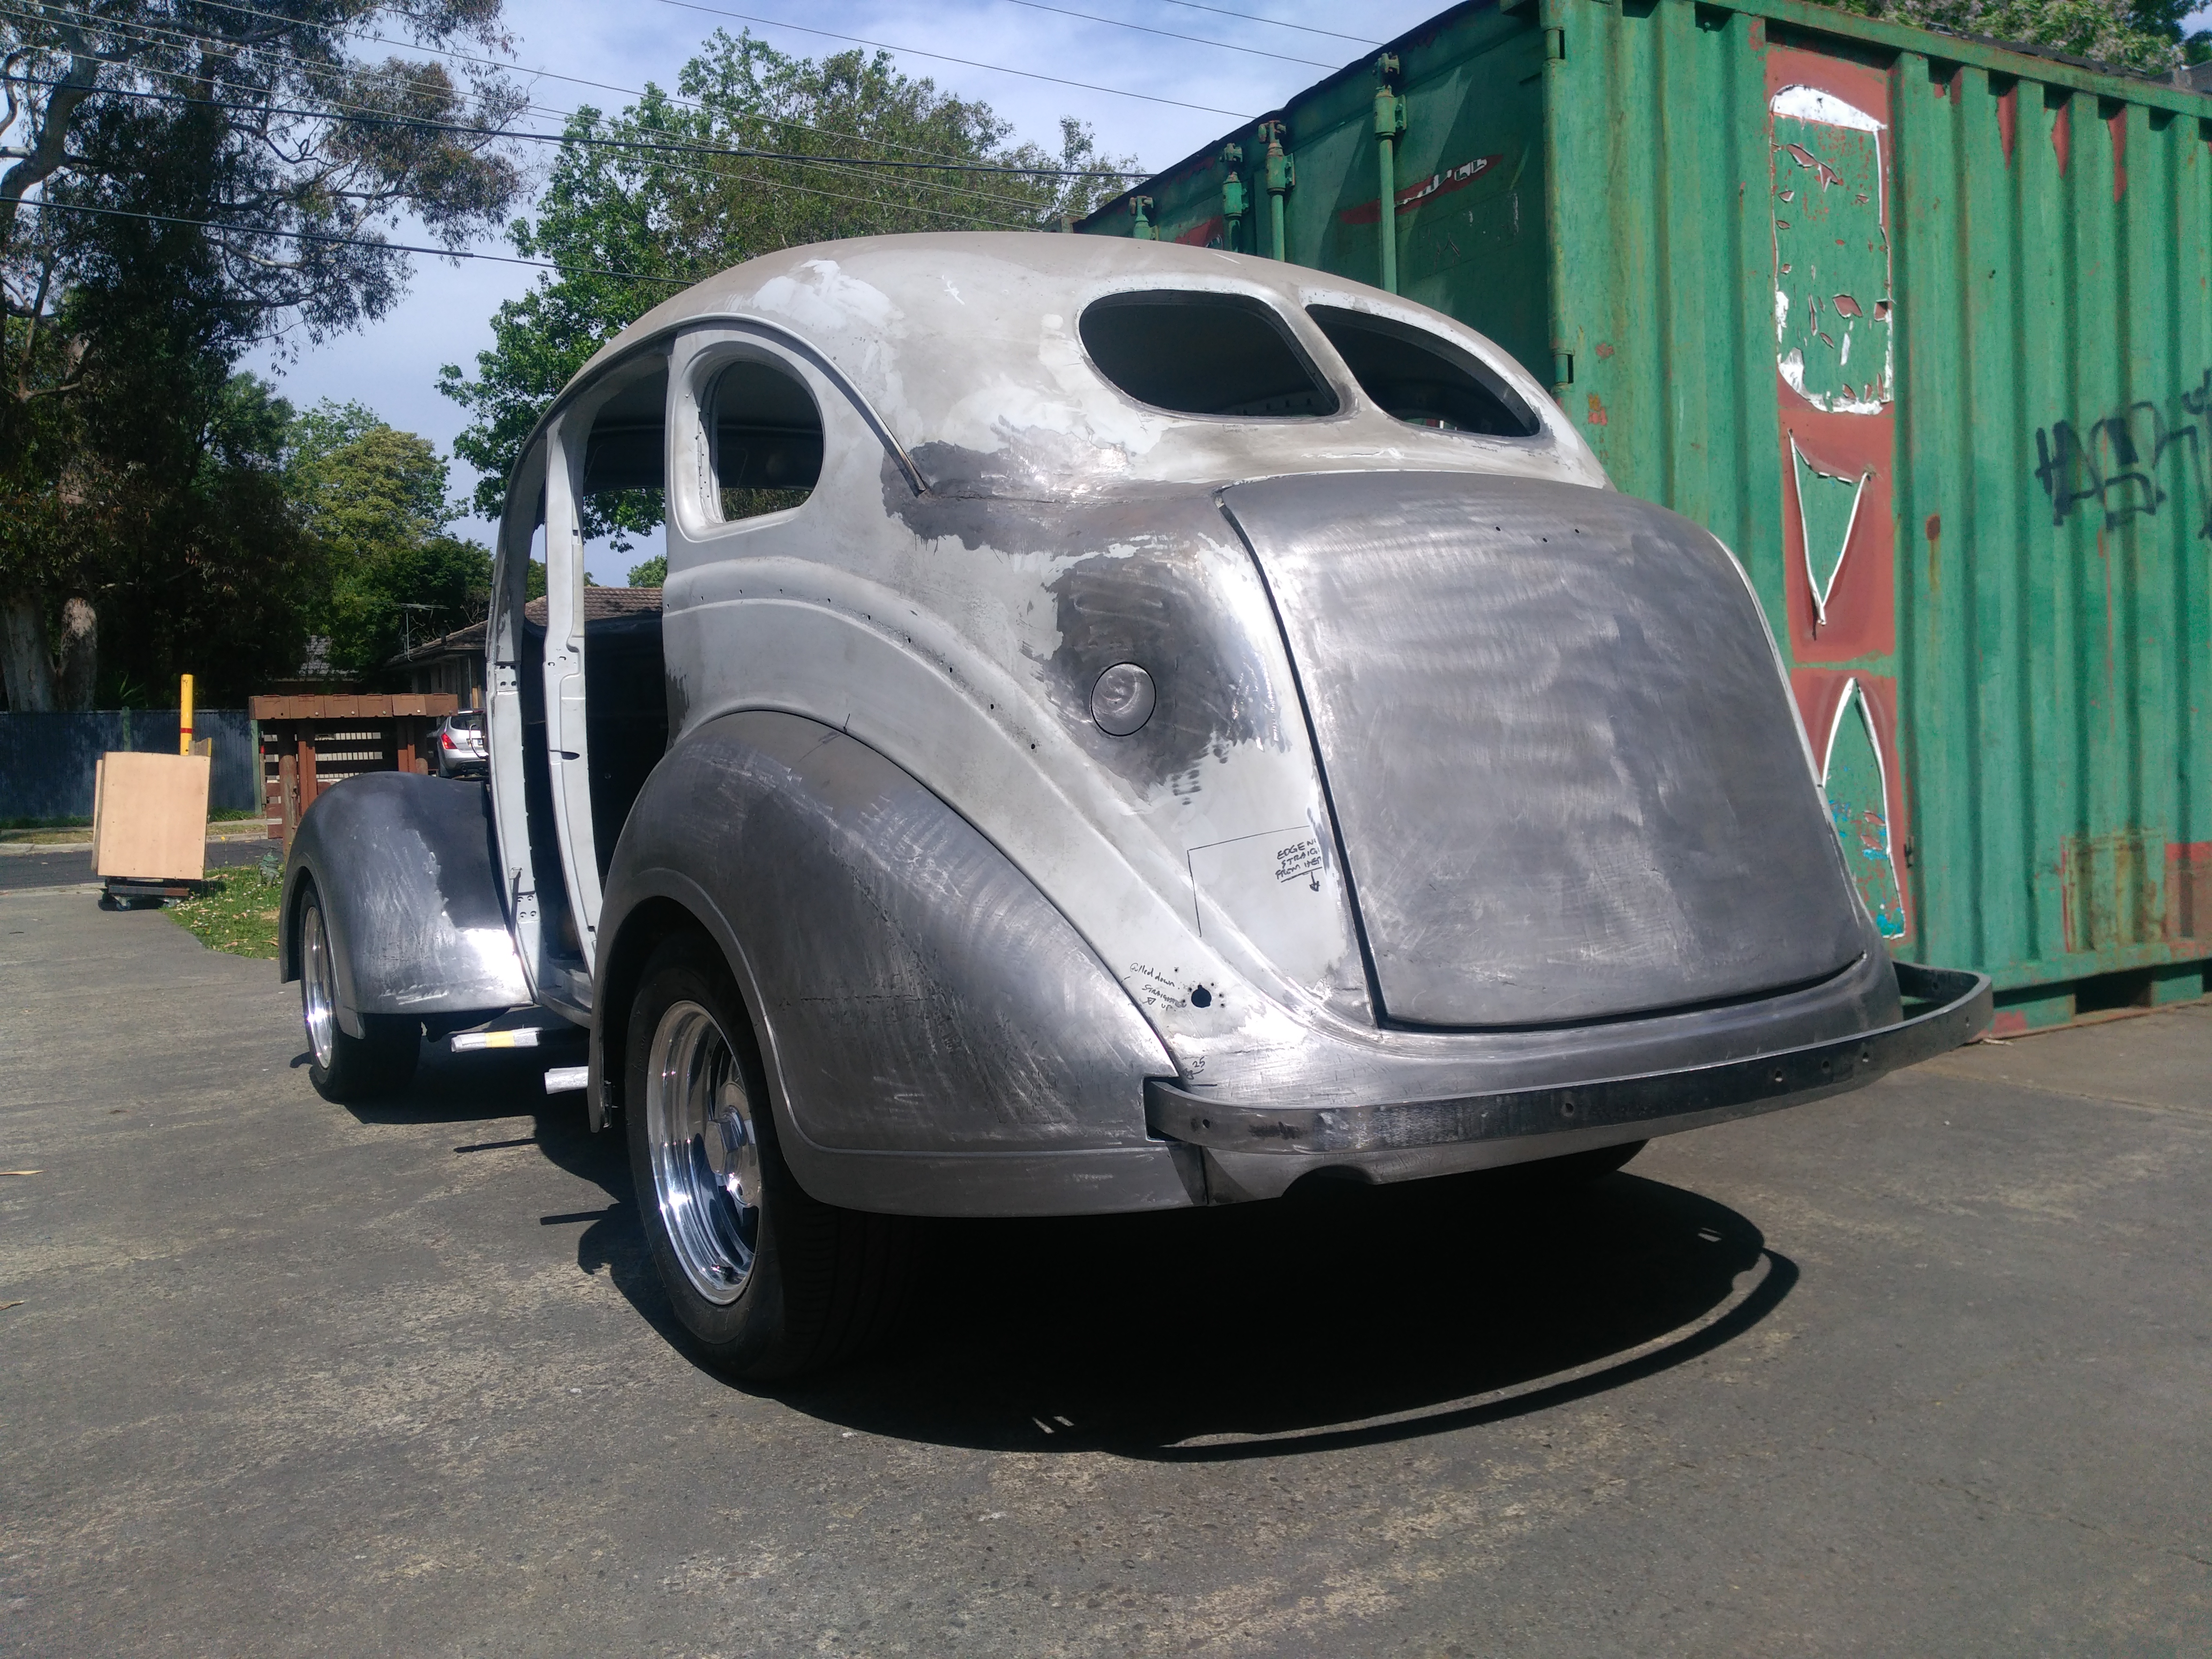
We have put a lot of time and effort into this 38 Plymouth.  The whole rear lower panel and floor right through to under the seat has been completely hand fabricated and replaced.  The front and rear mud guards have been widened and the shape reworked for cleaner lines, the guard edge now follows the wheel's shape and shall feature a straight edge running board.to clean up those ugly Plymouth bits but still retain some typically Plymouth features like the swage lines. We have basically just fattened it up and made it more curvey.

Custom made, hand rolled, sheet metal mudguards made to suit custom chassis

 by kustombitz on 14 Feb 2018 |
No Comment
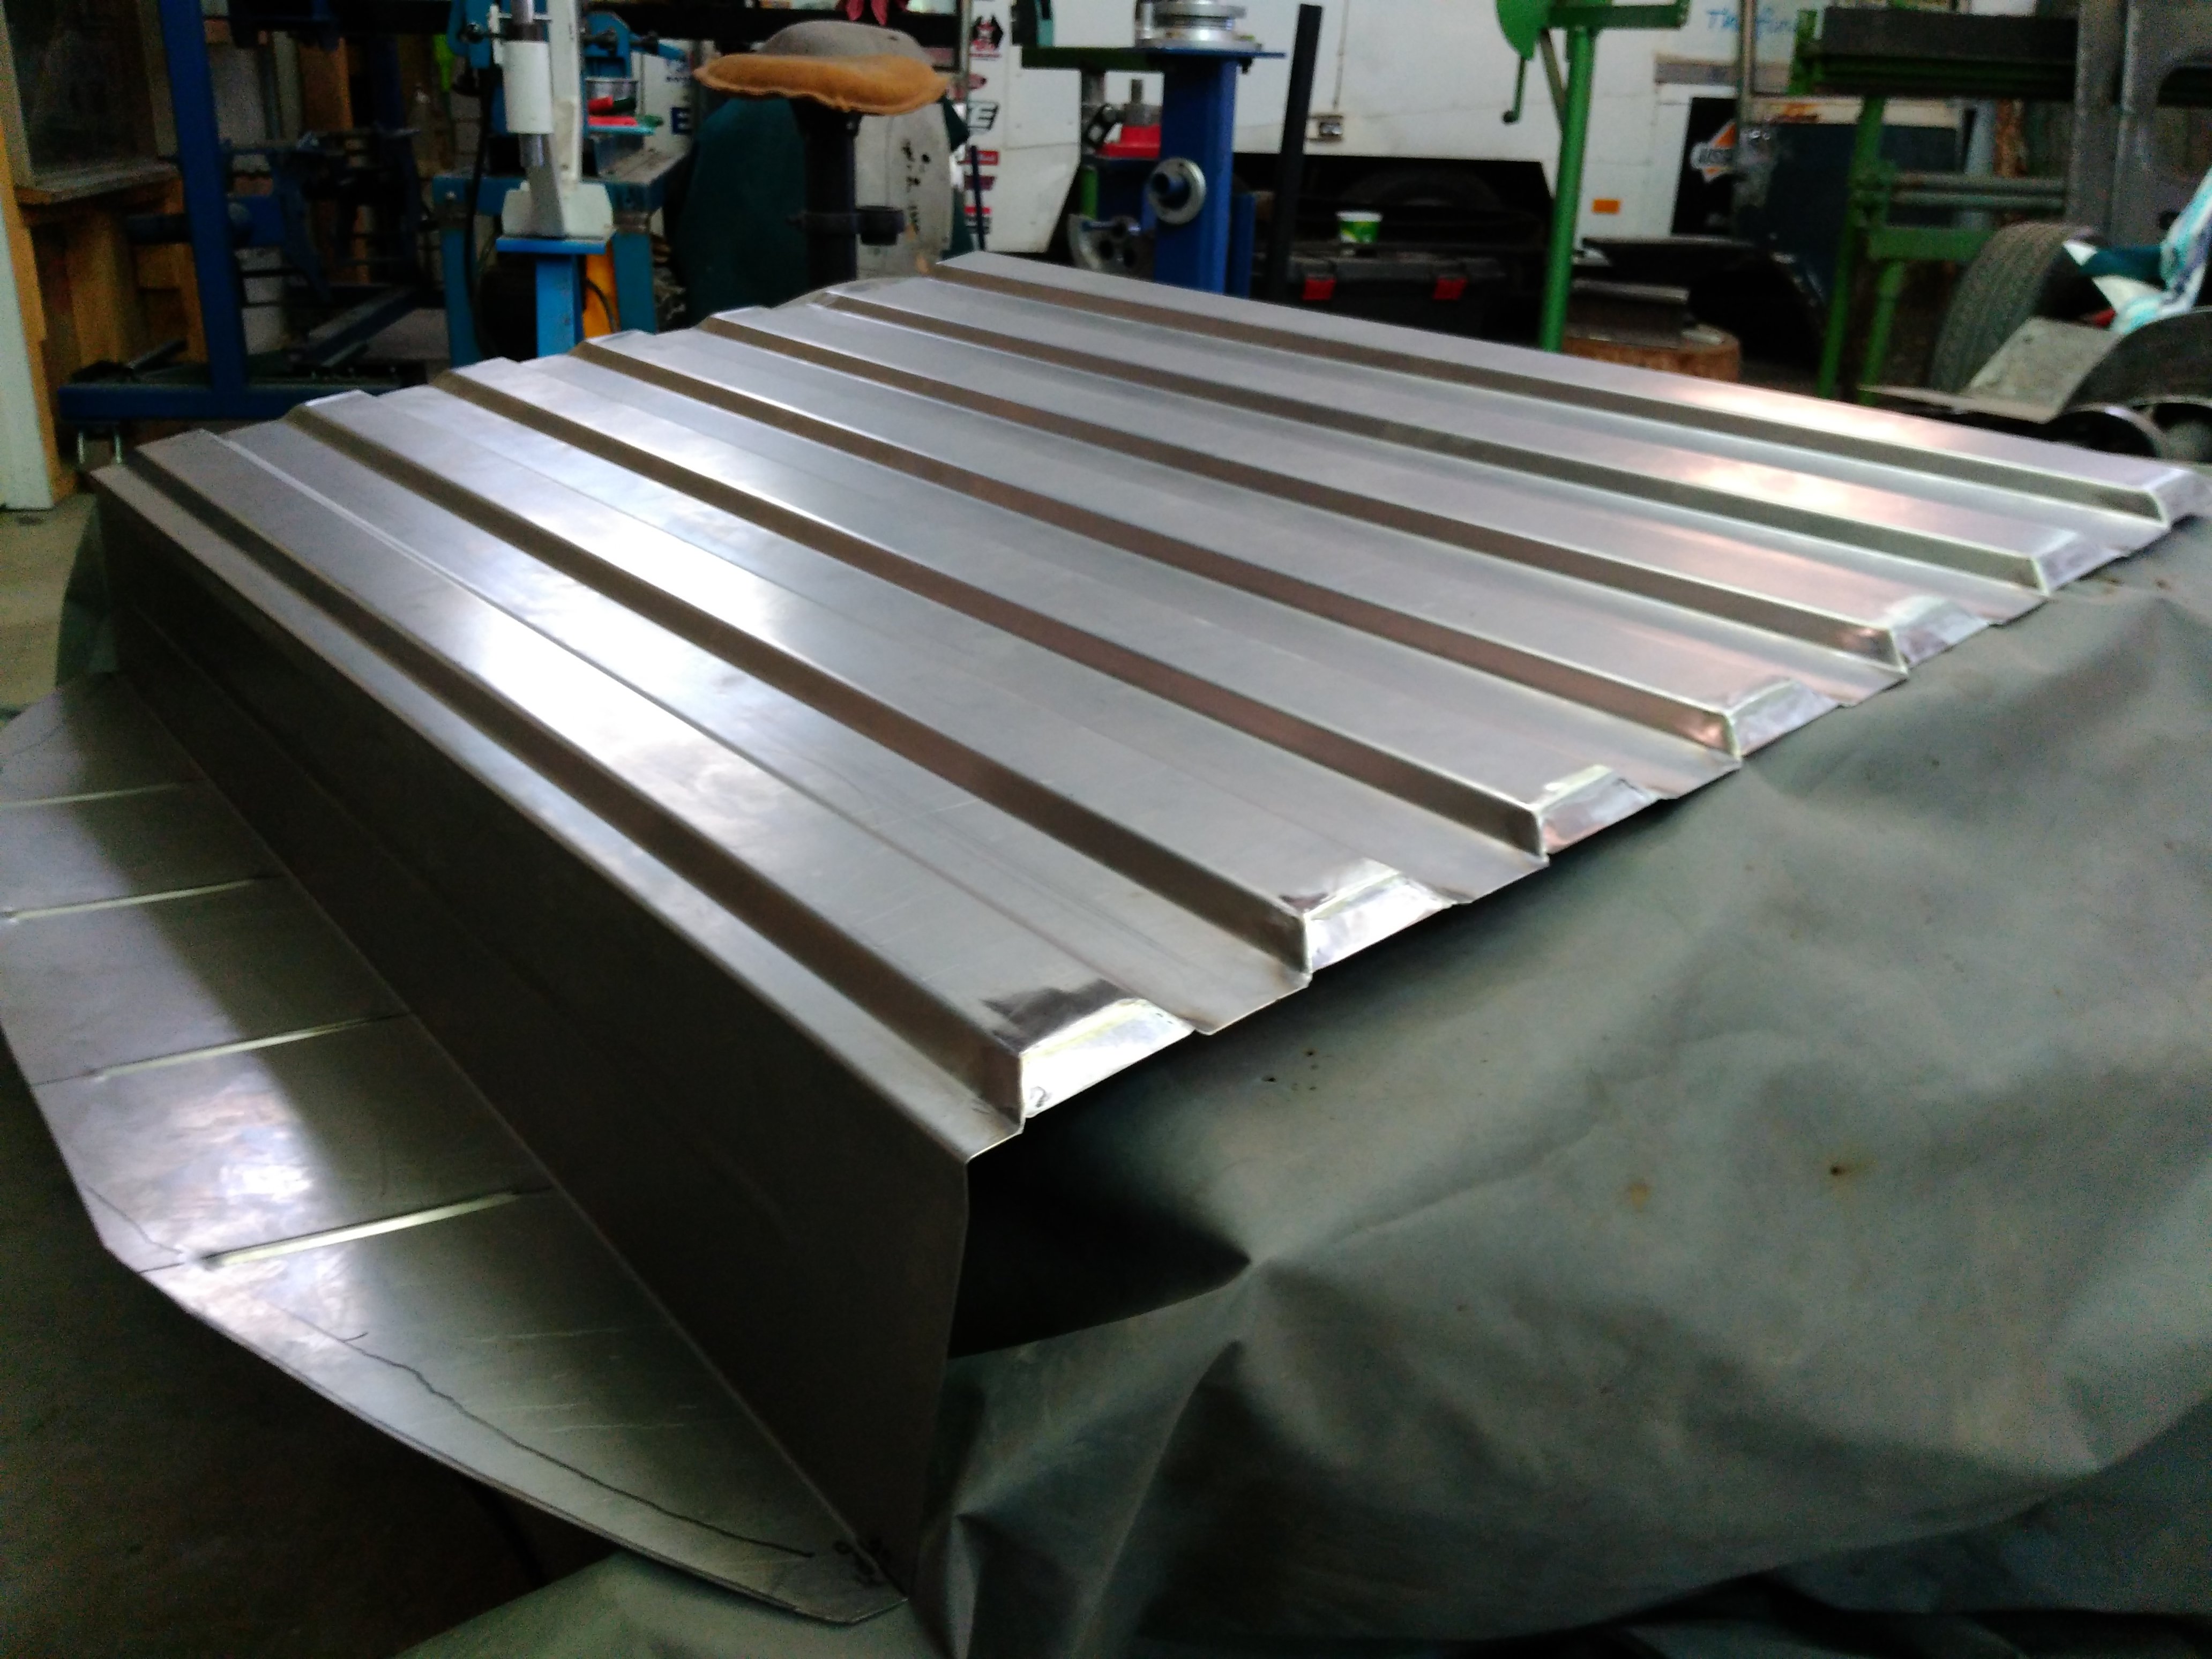
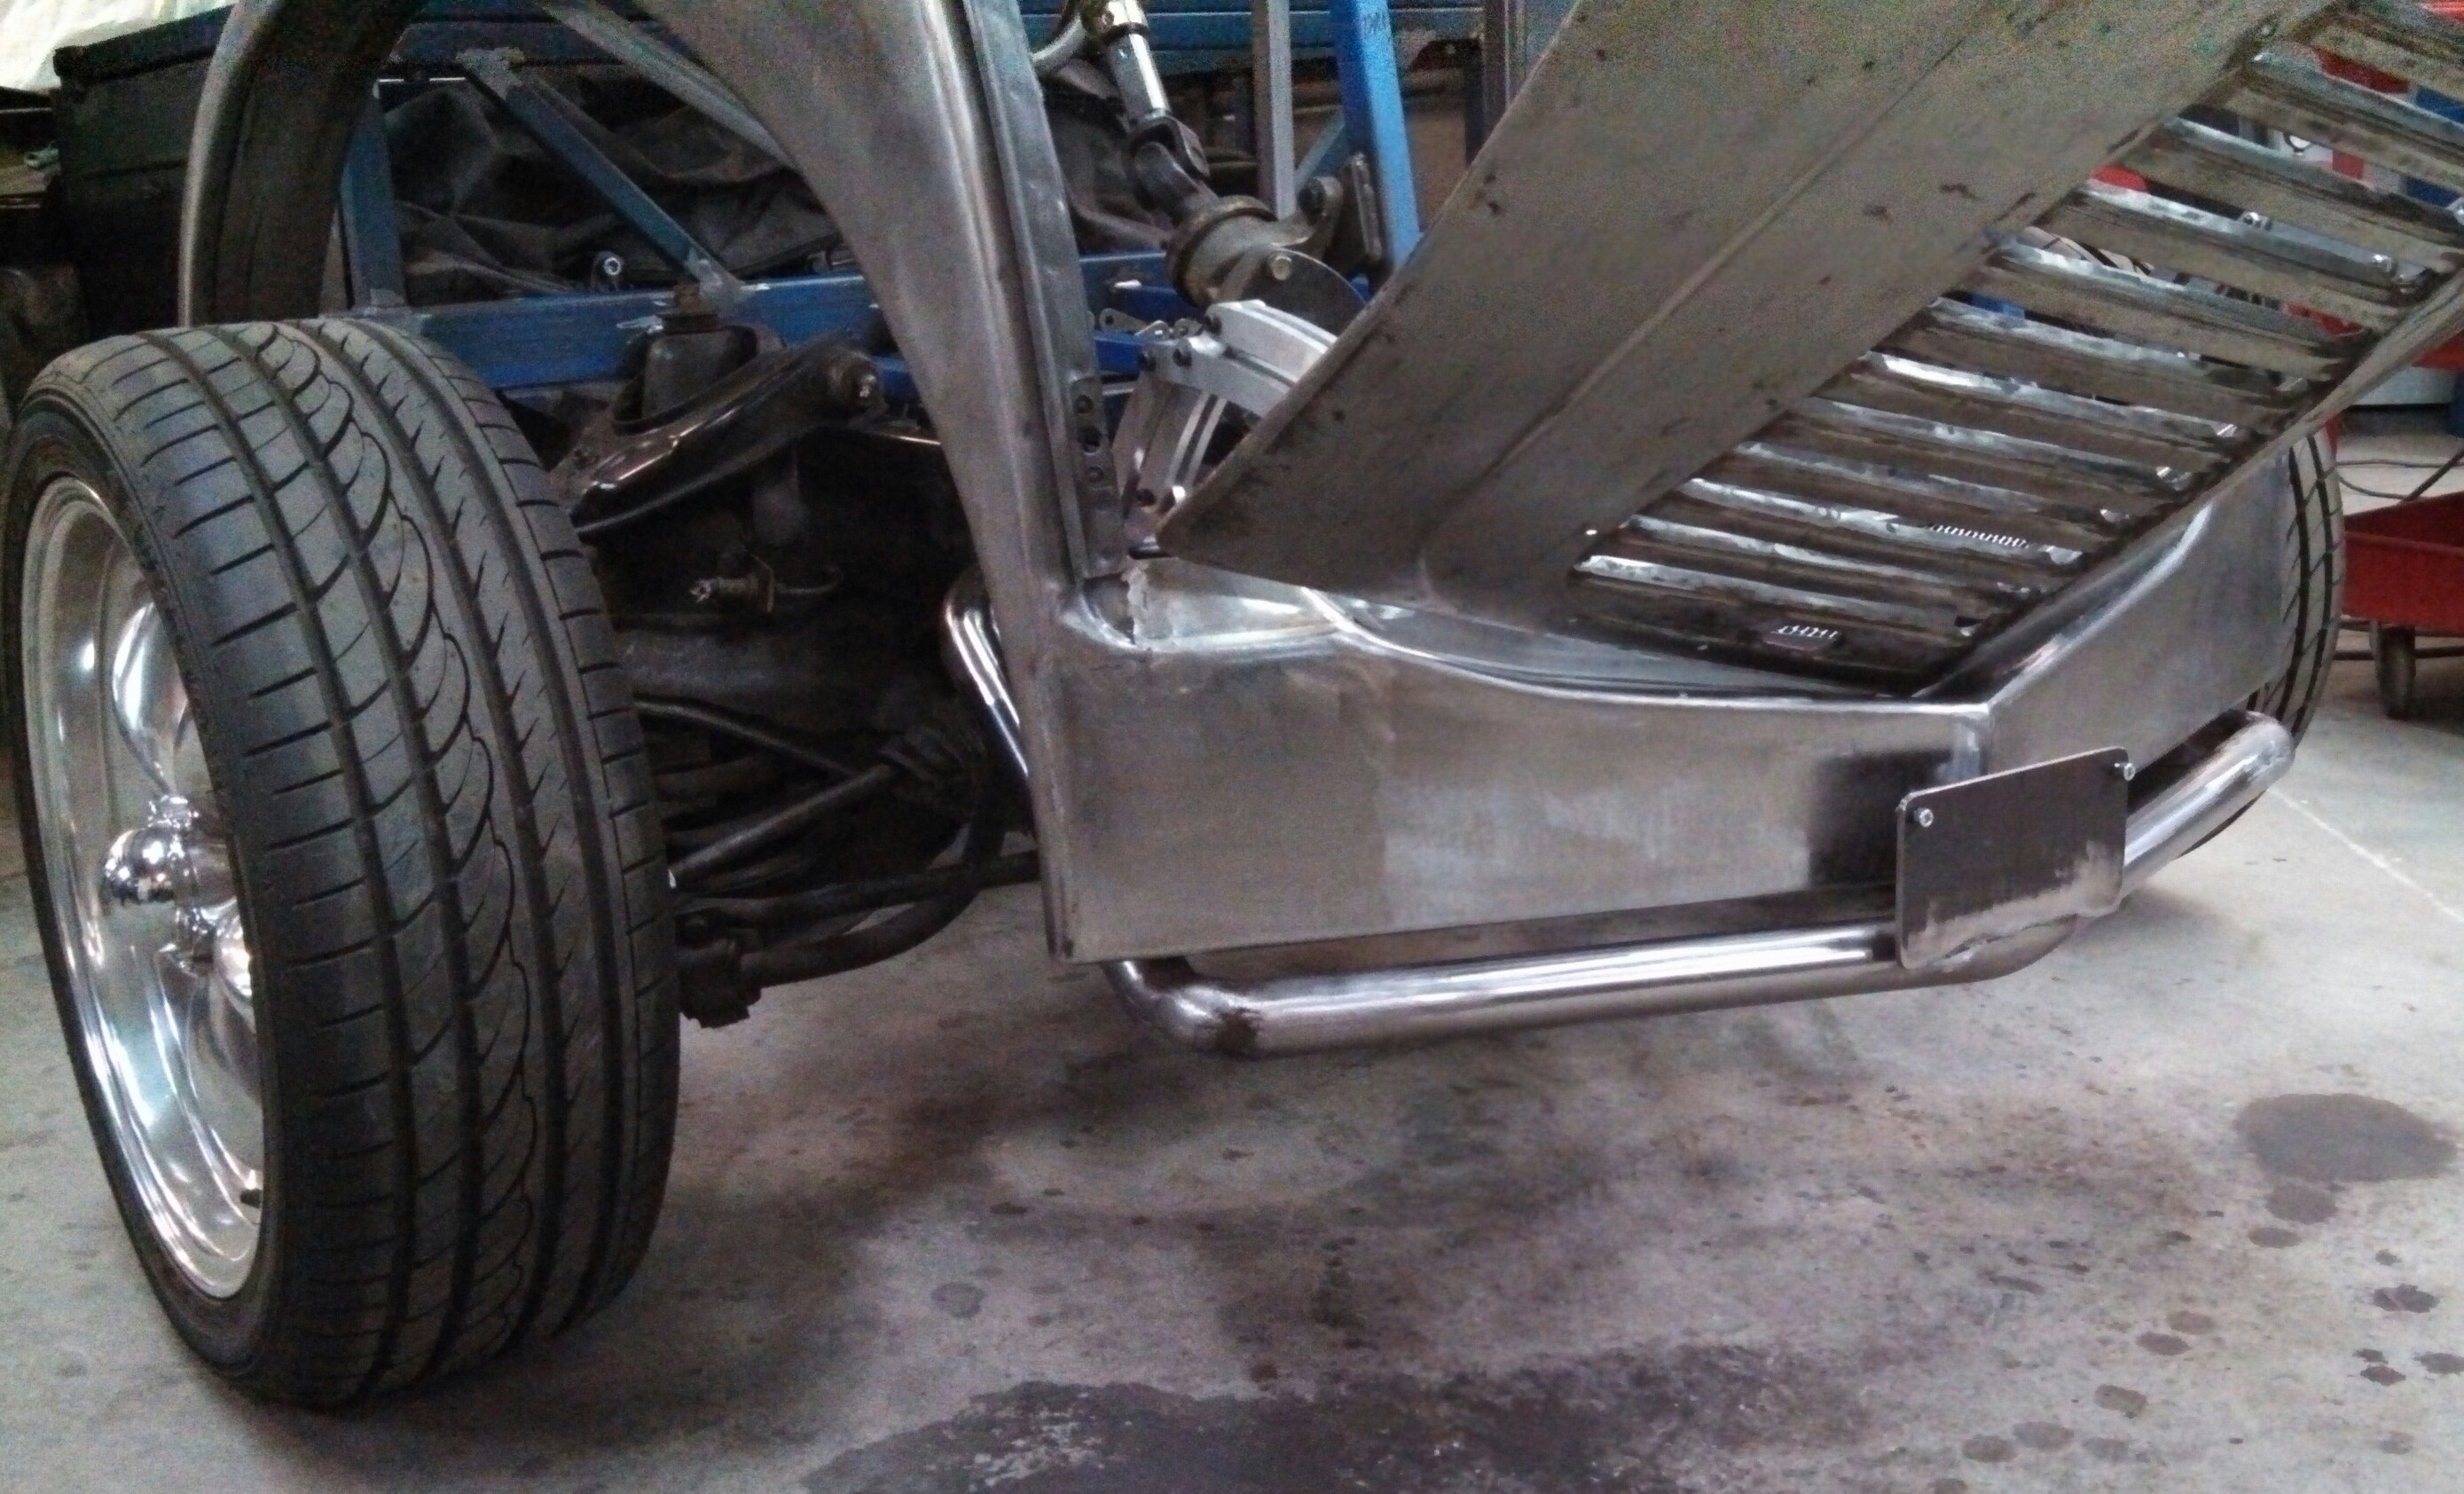
Shown here is the rear mud guards I made from scratch for the Morris J Type van. Made from cold drawn panel steel I have shaped them to suit the new drive line, the body mods and the shape matches closely to the modified front guards so that they don't look out of place. I am pretty happy how this custom Morris delivery is turning out.

Morris J Type van with hand fabricated rear doors

 by kustombitz on 17 Aug 2017 |
No Comment
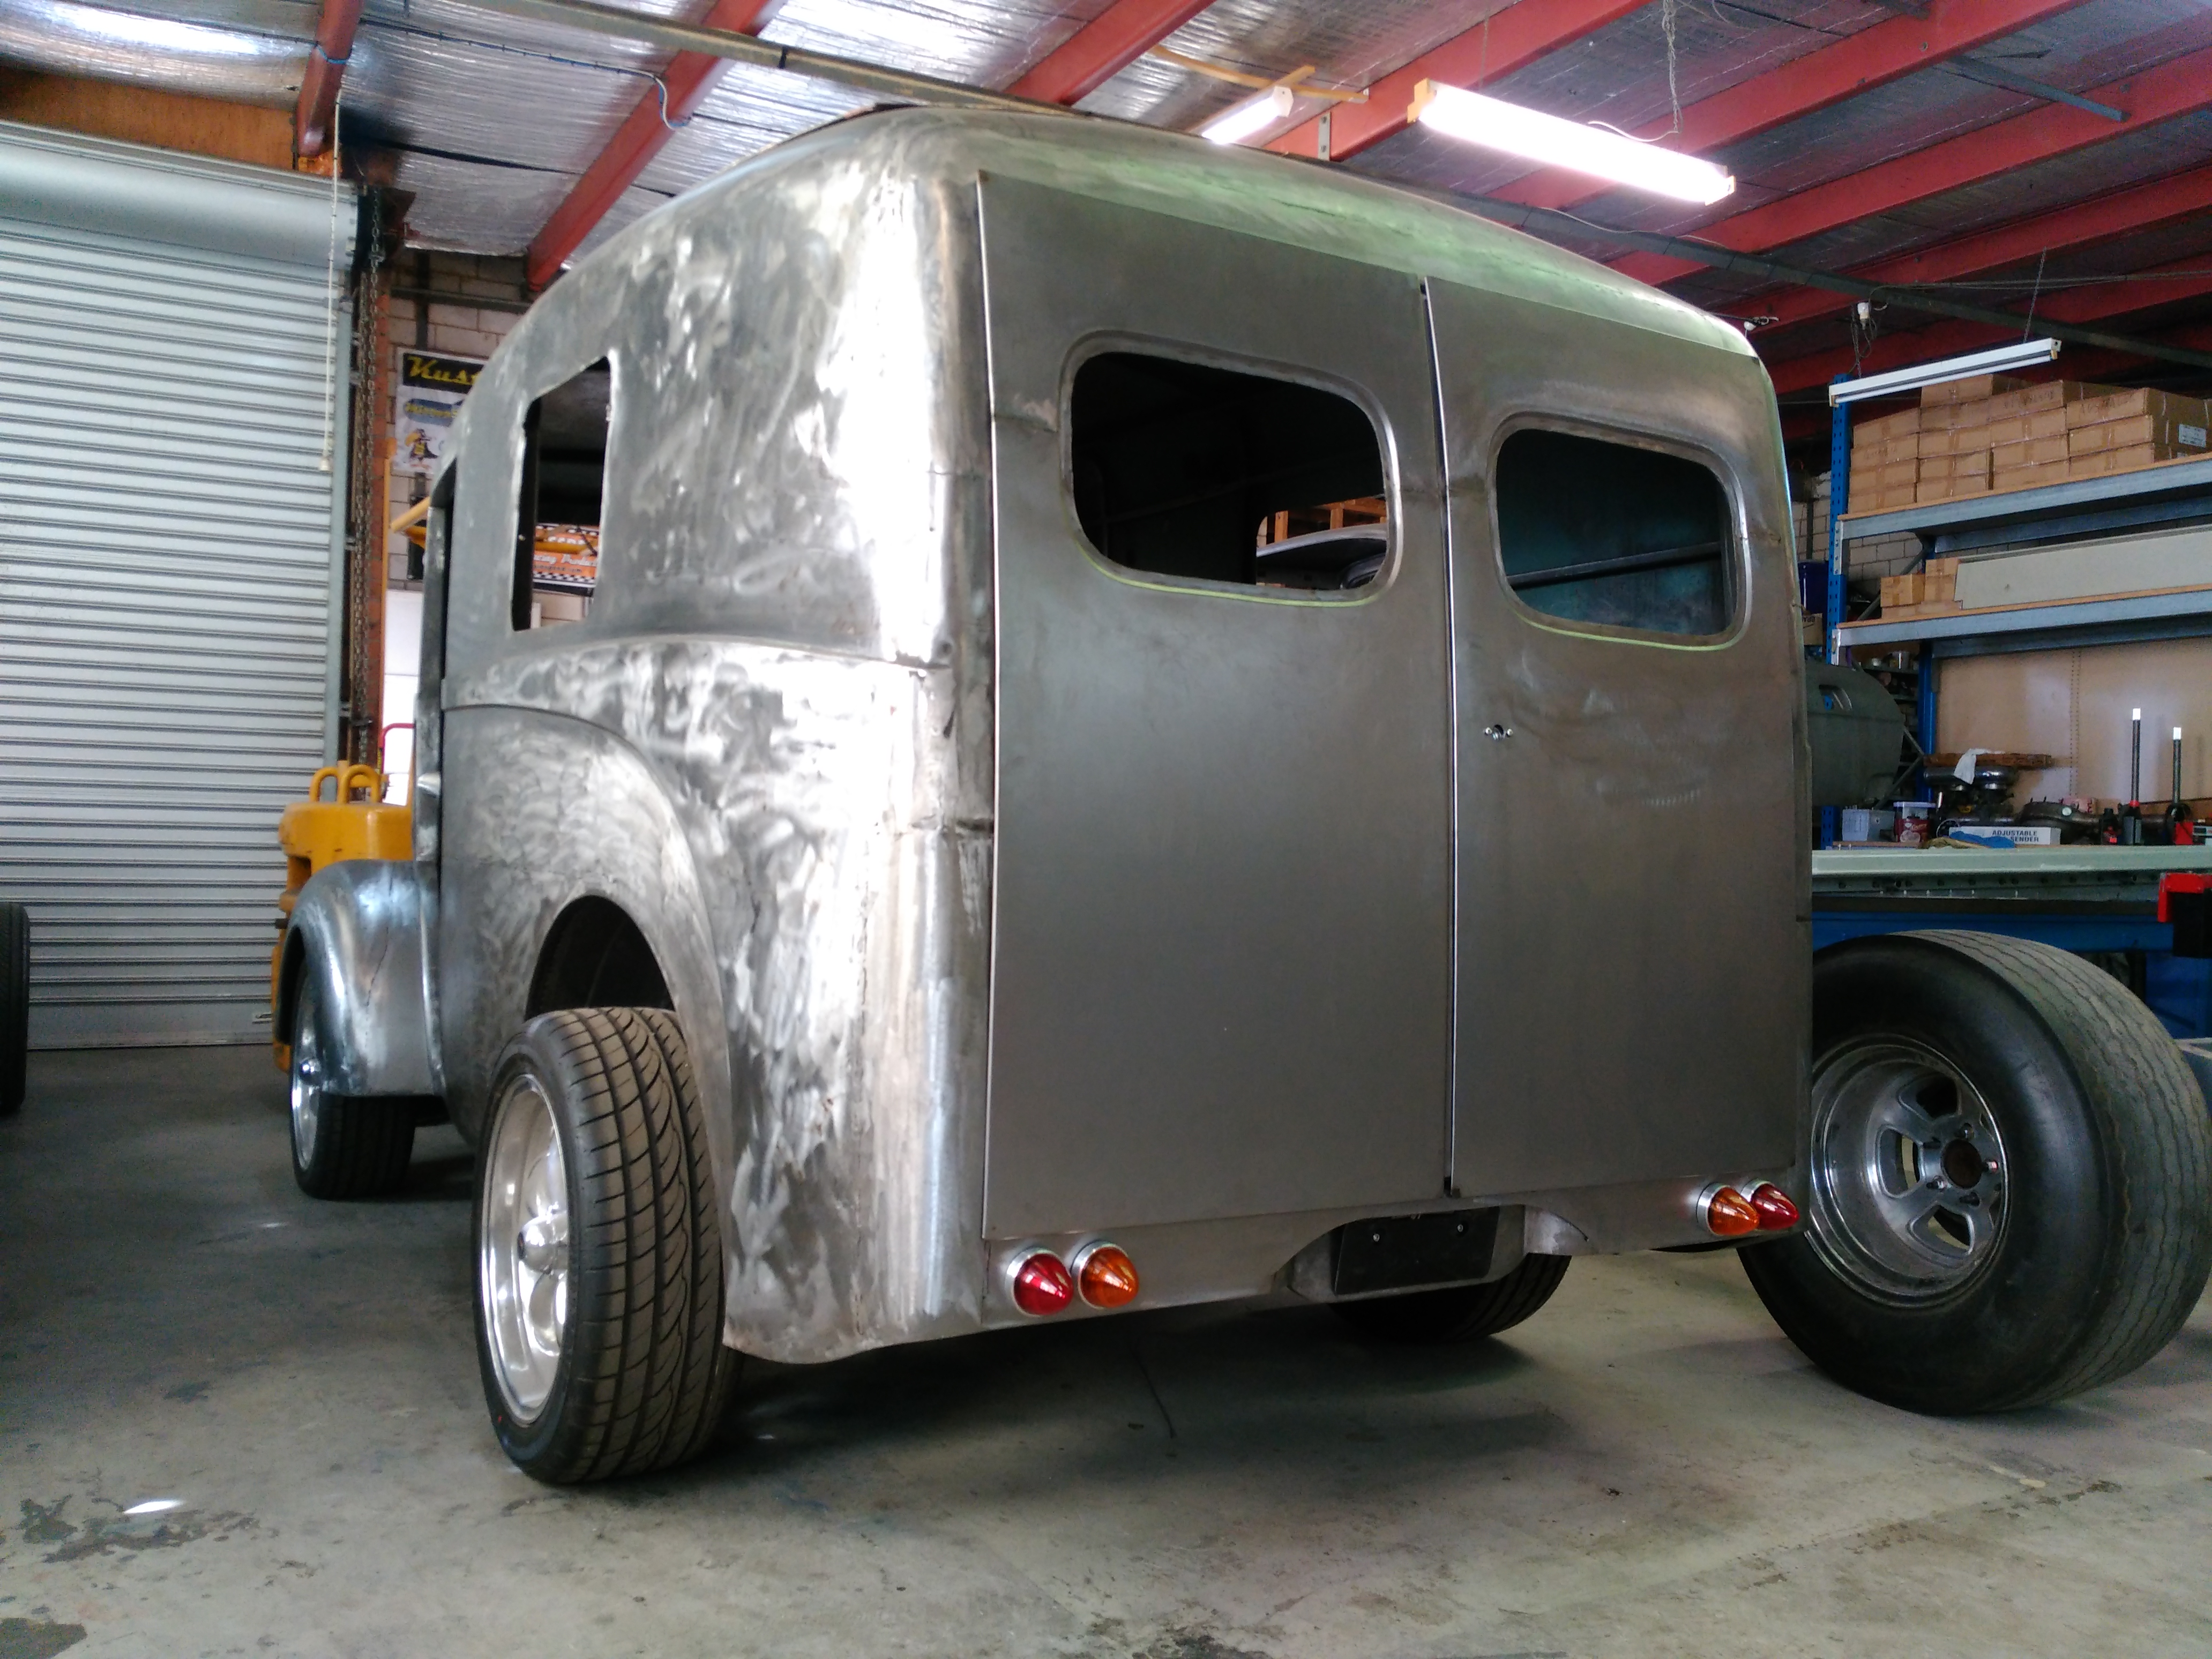
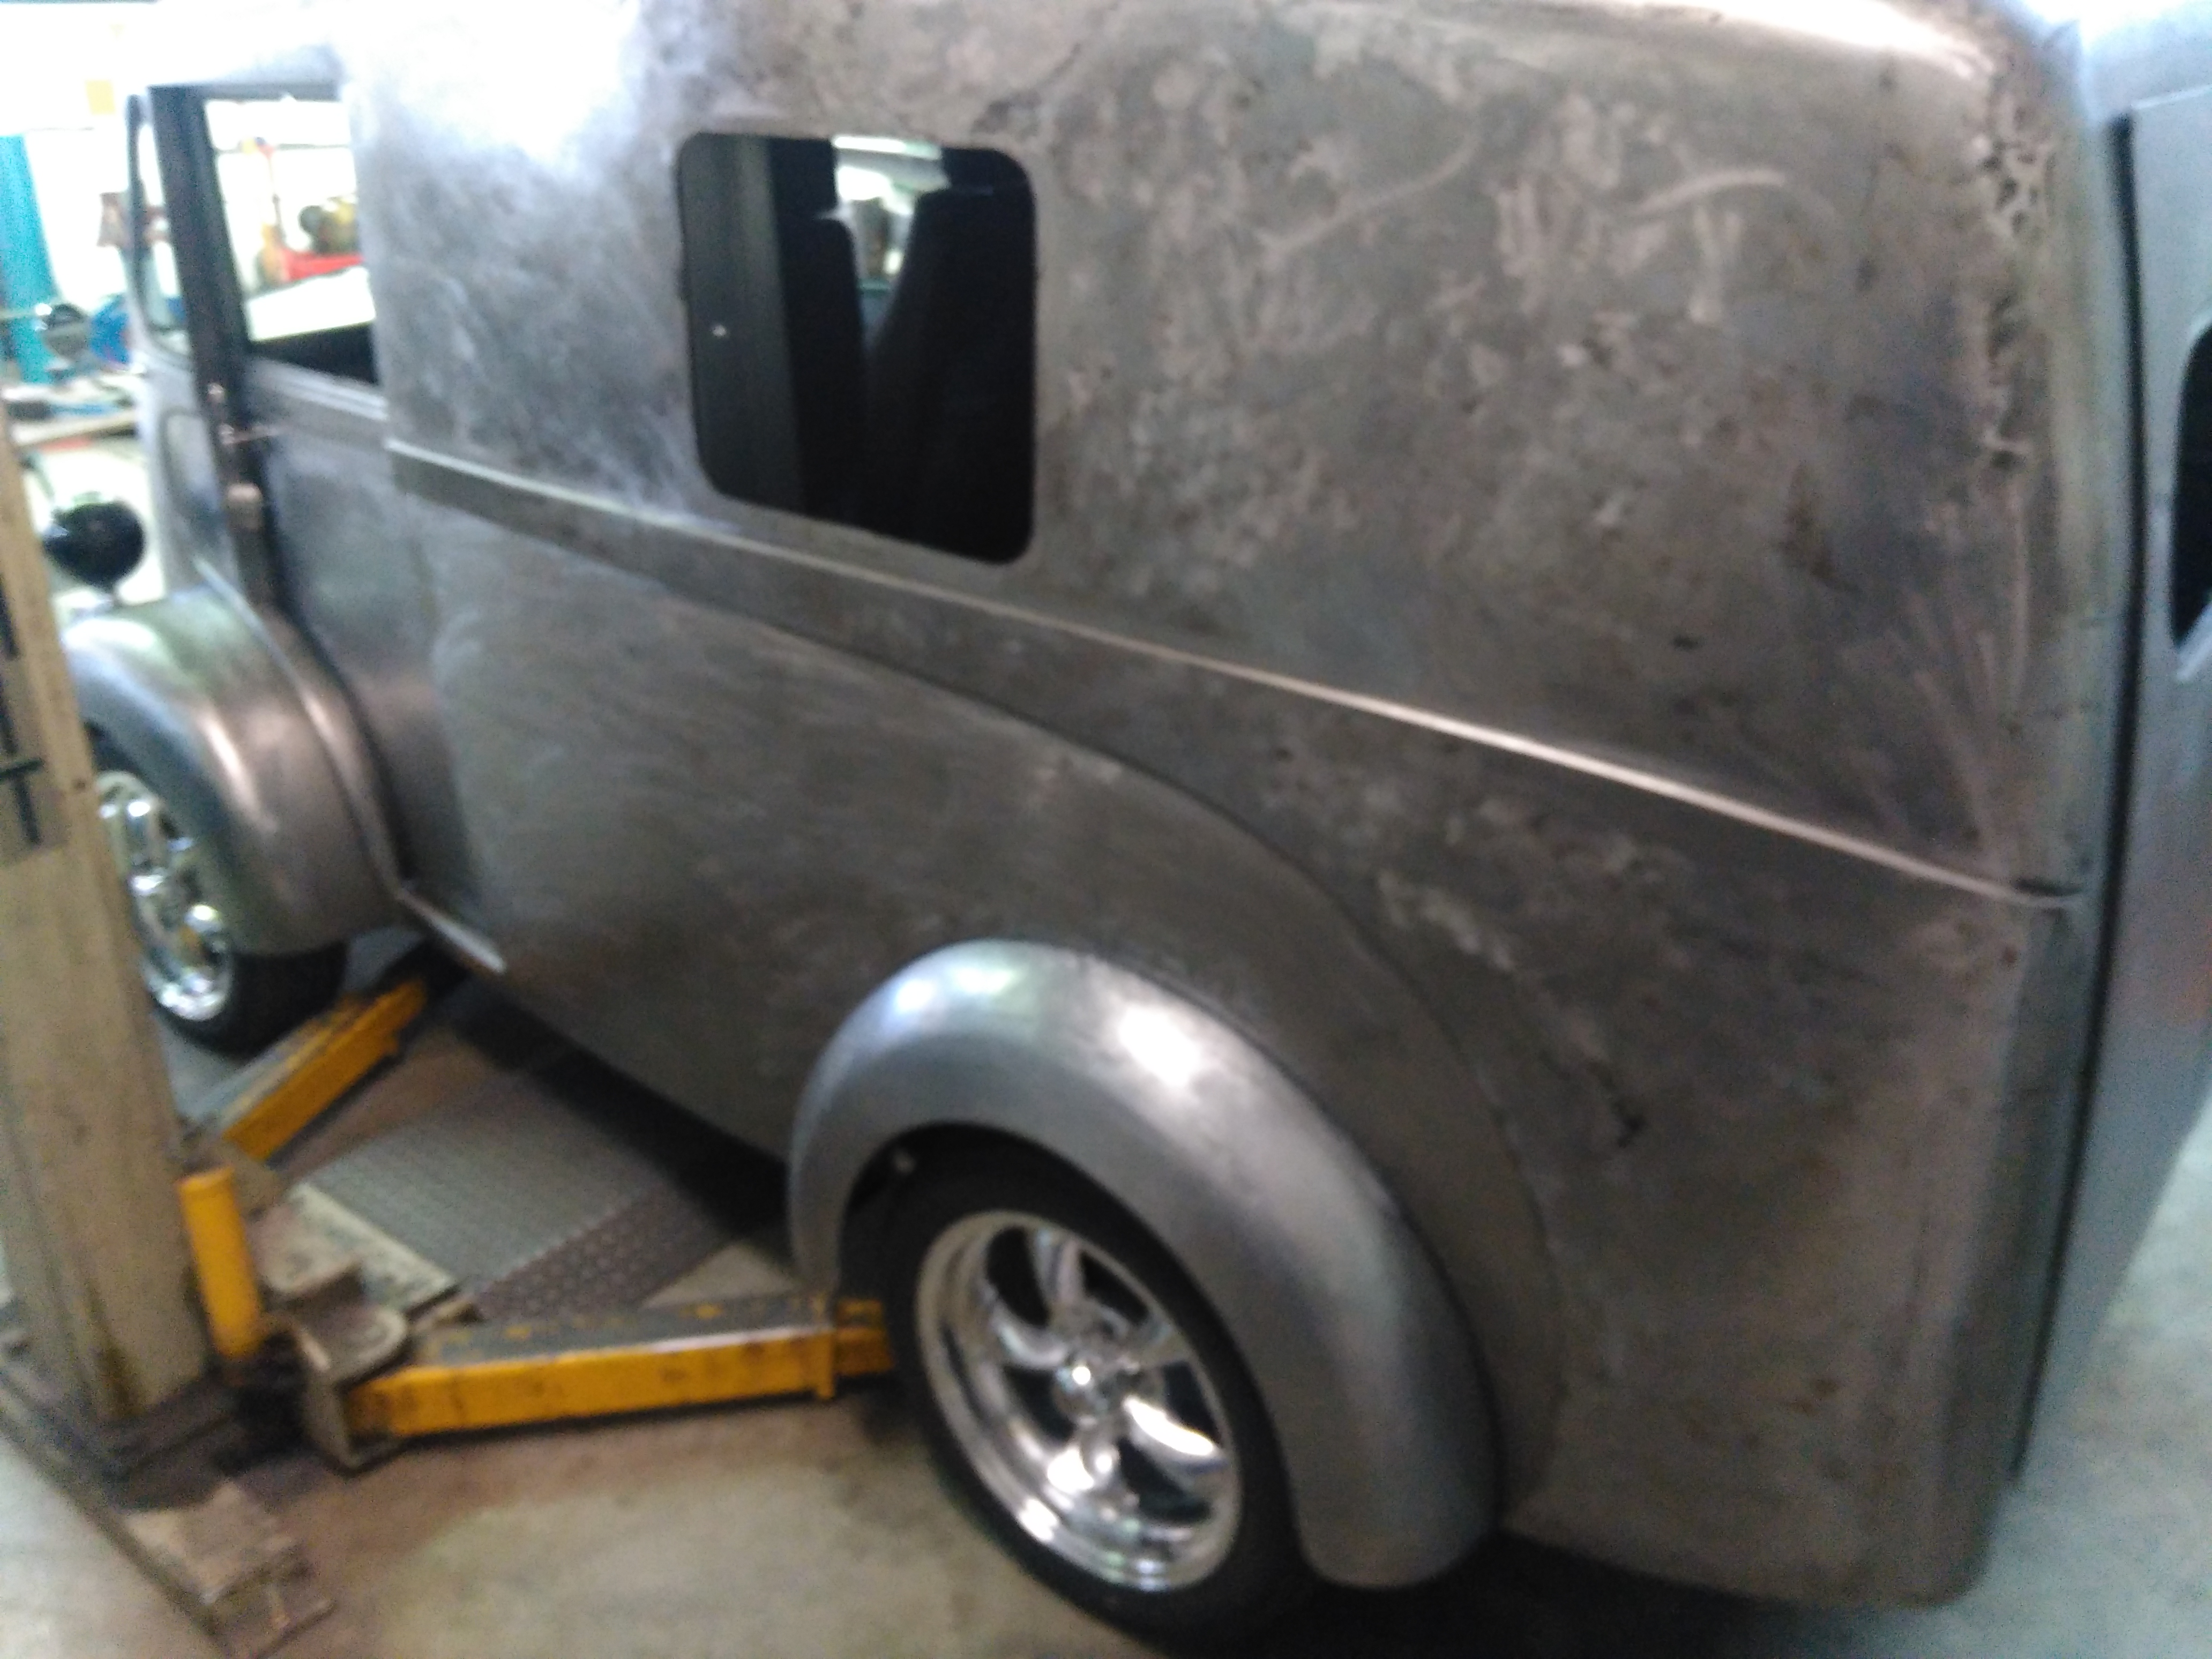
The rear doors on this little Morris J we are working on were pretty sad and the hinges were that worn I decided to start from scratch. The old doors were going to cost alot to repair and in the end they still would have been rough, it would have been like trying to make caviar from a pigs ear.  Its not a decision to take lightly as it is an expensive exercise to make hinges from scratch and the doors from scratch and get it all working, but the end result is what you are chasing.  The customer now has doors with a good well planned out rubber seal, a proper stepped overlap in the middle, hignges that don't let the doors swing around and hit the body,a high tensile long hinge pin, inner skins that unscrew to allow panel repairs and bear claw latches on both doors so they dont fly open.  The back window was modelled off the original Morris J van doors, of which incedentally is not symetrical, and it is the shape of this back window that makes it instantly reconisable so I went to great pains to keep it accurate to original.

38 Plymouth hand formed rear roll pan rust repair

 by kustombitz on 07 Aug 2017 |
No Comment
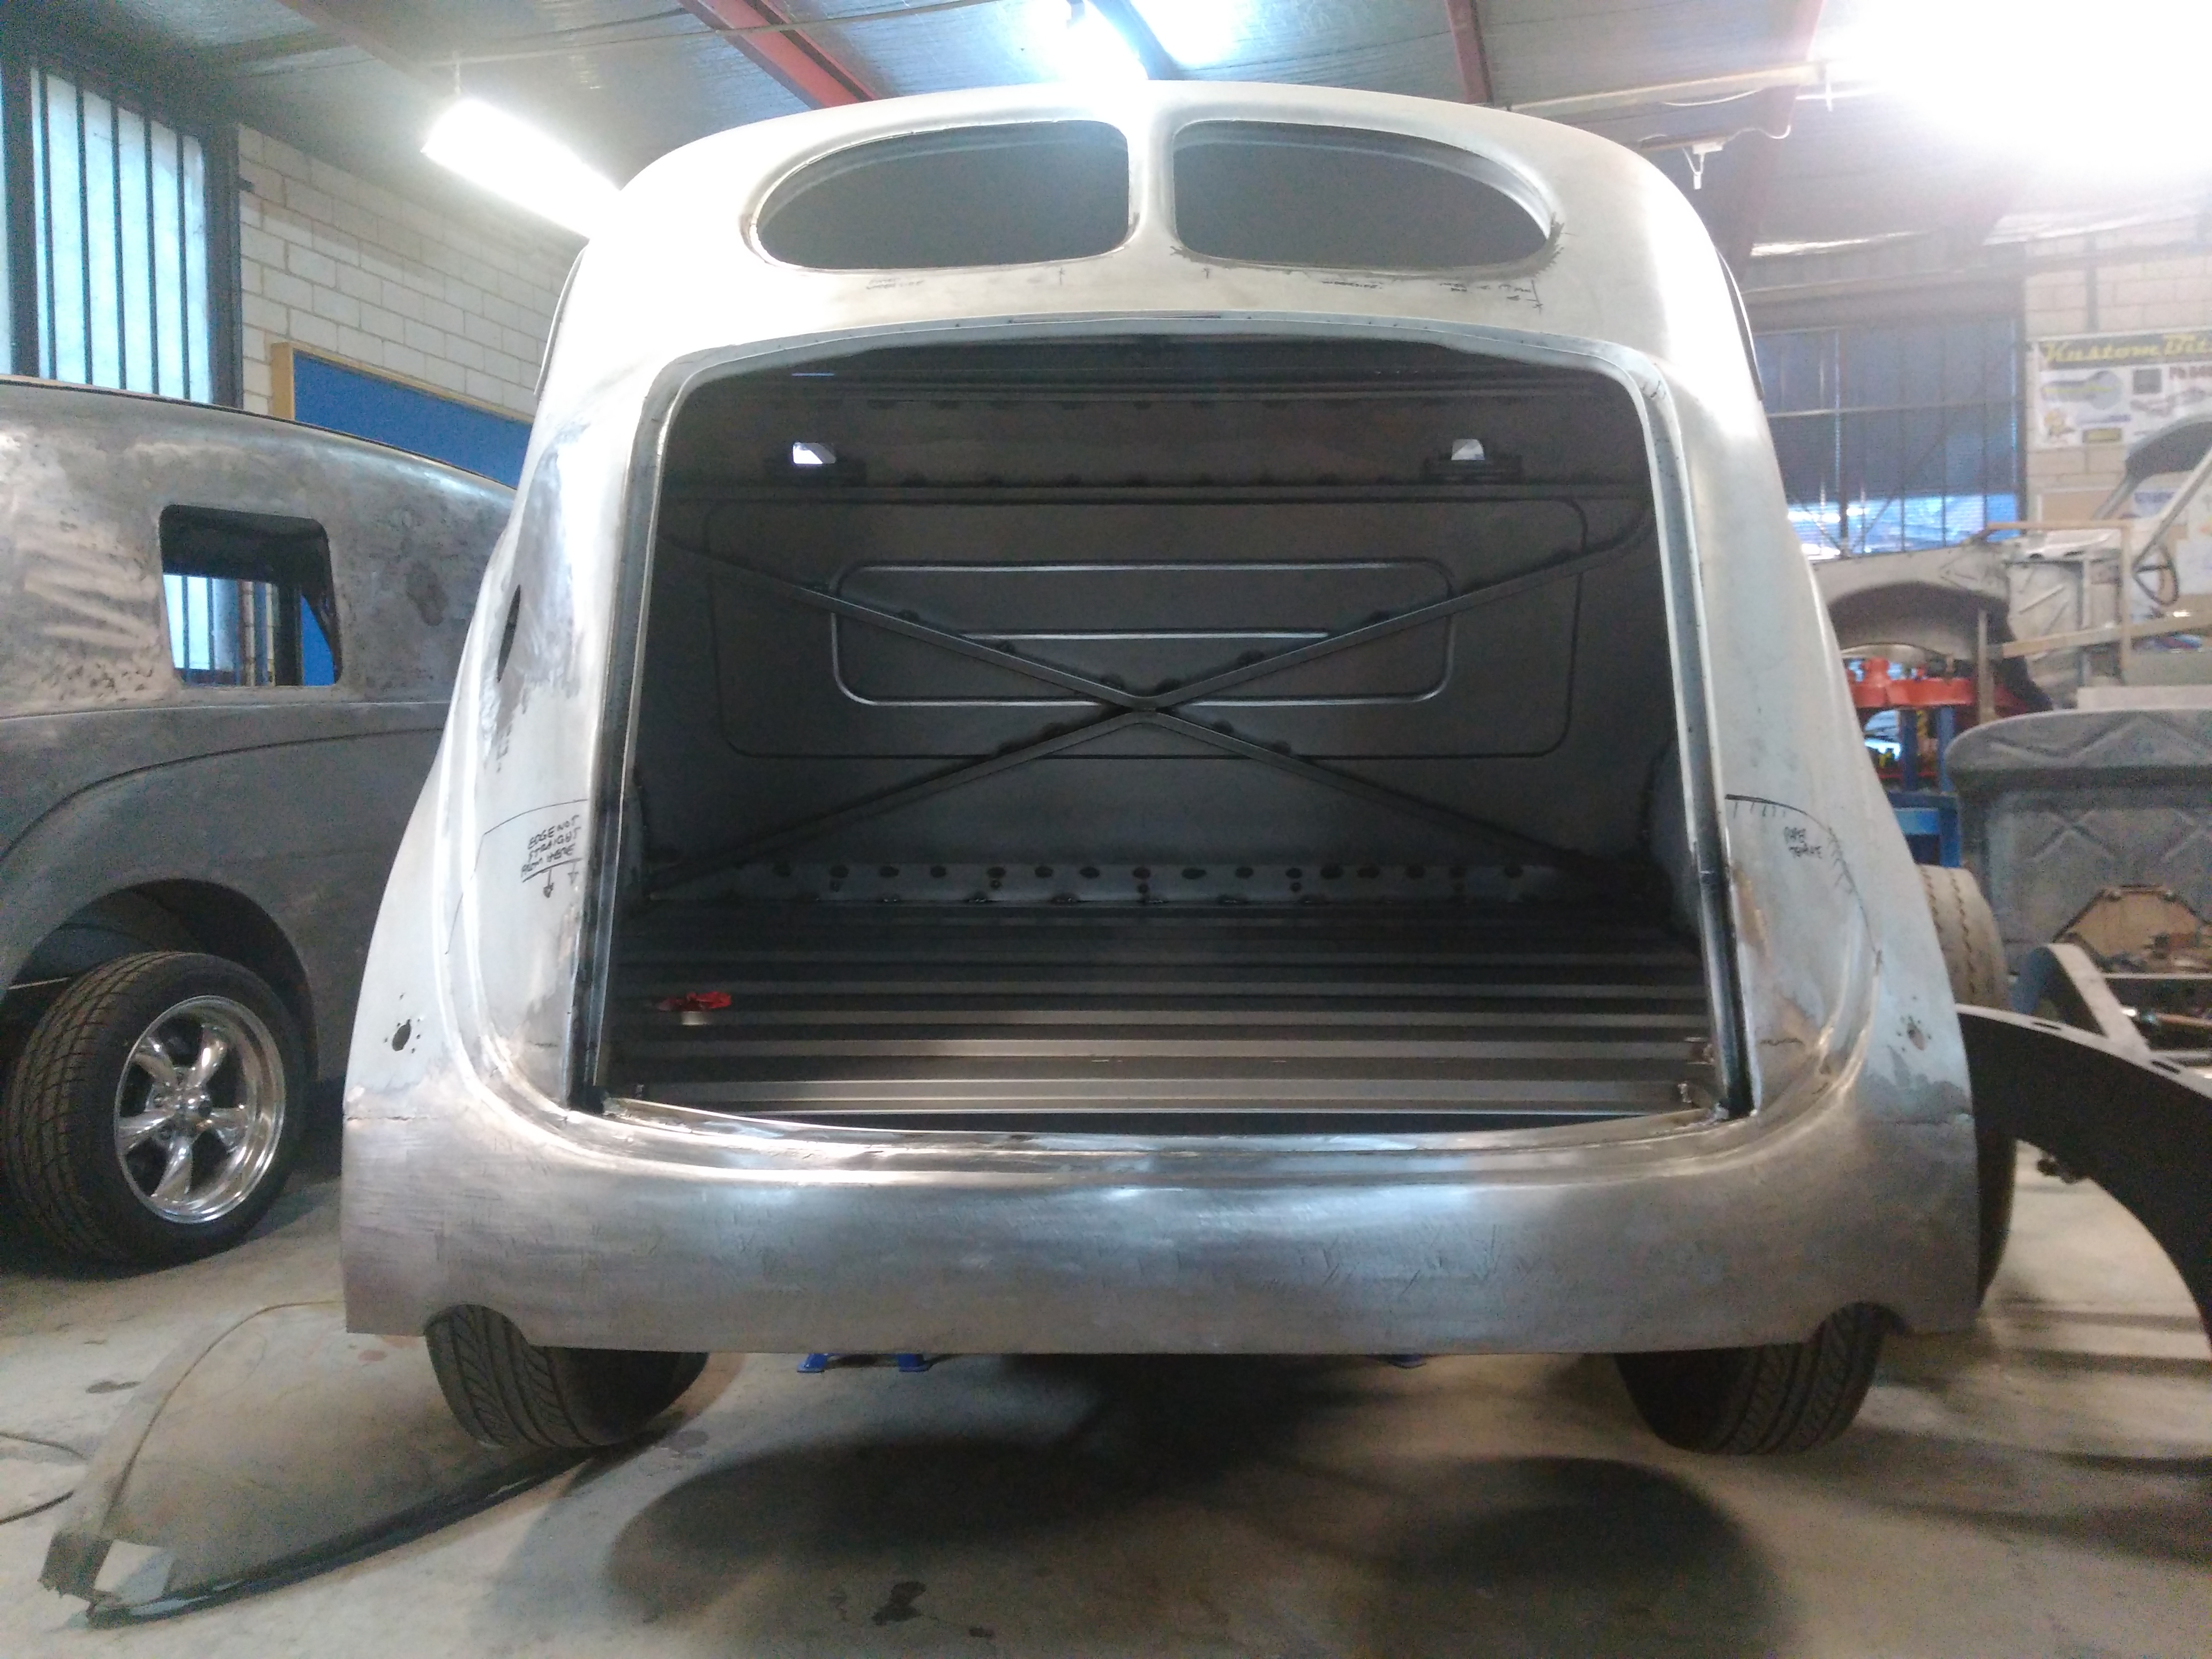
With the rear floor done and the back seat panel finished it was time to roll up a new rear tail pan on the 38 Plymouth.  It certainly was not easy, a complex compound curve with a dead flat bottom and a double swage line through it and a pair of exhaust slots.  It has come up well though.

38 Plymouth sedan new custom tailored boot floor and inner tail pan

 by kustombitz on 12 Jul 2017 |
No Comment
The 38 Plymouth has a Jag diff and aftermarket 32 Ford fuel tank so the old rusty floor had been removed.  To give the floor some strength I went with deep ribs because there was no frame under the floor and not room for a frame between the chassis mounted fuel tank and the floor.  The step down at the back drops down to line up with the bottom of the rear sill panel to box it in and make it resistant to body flex once its all welded in.  This was all formed in one piece, how ever to install it the rear sill panel was cut out, it was all rusted through anyway and required a custom formed piece too.

Ford Mercury 49-50 9" diff, disc brakes and custom tank all hidden

 by kustombitz on 11 Jul 2017 |
No Comment
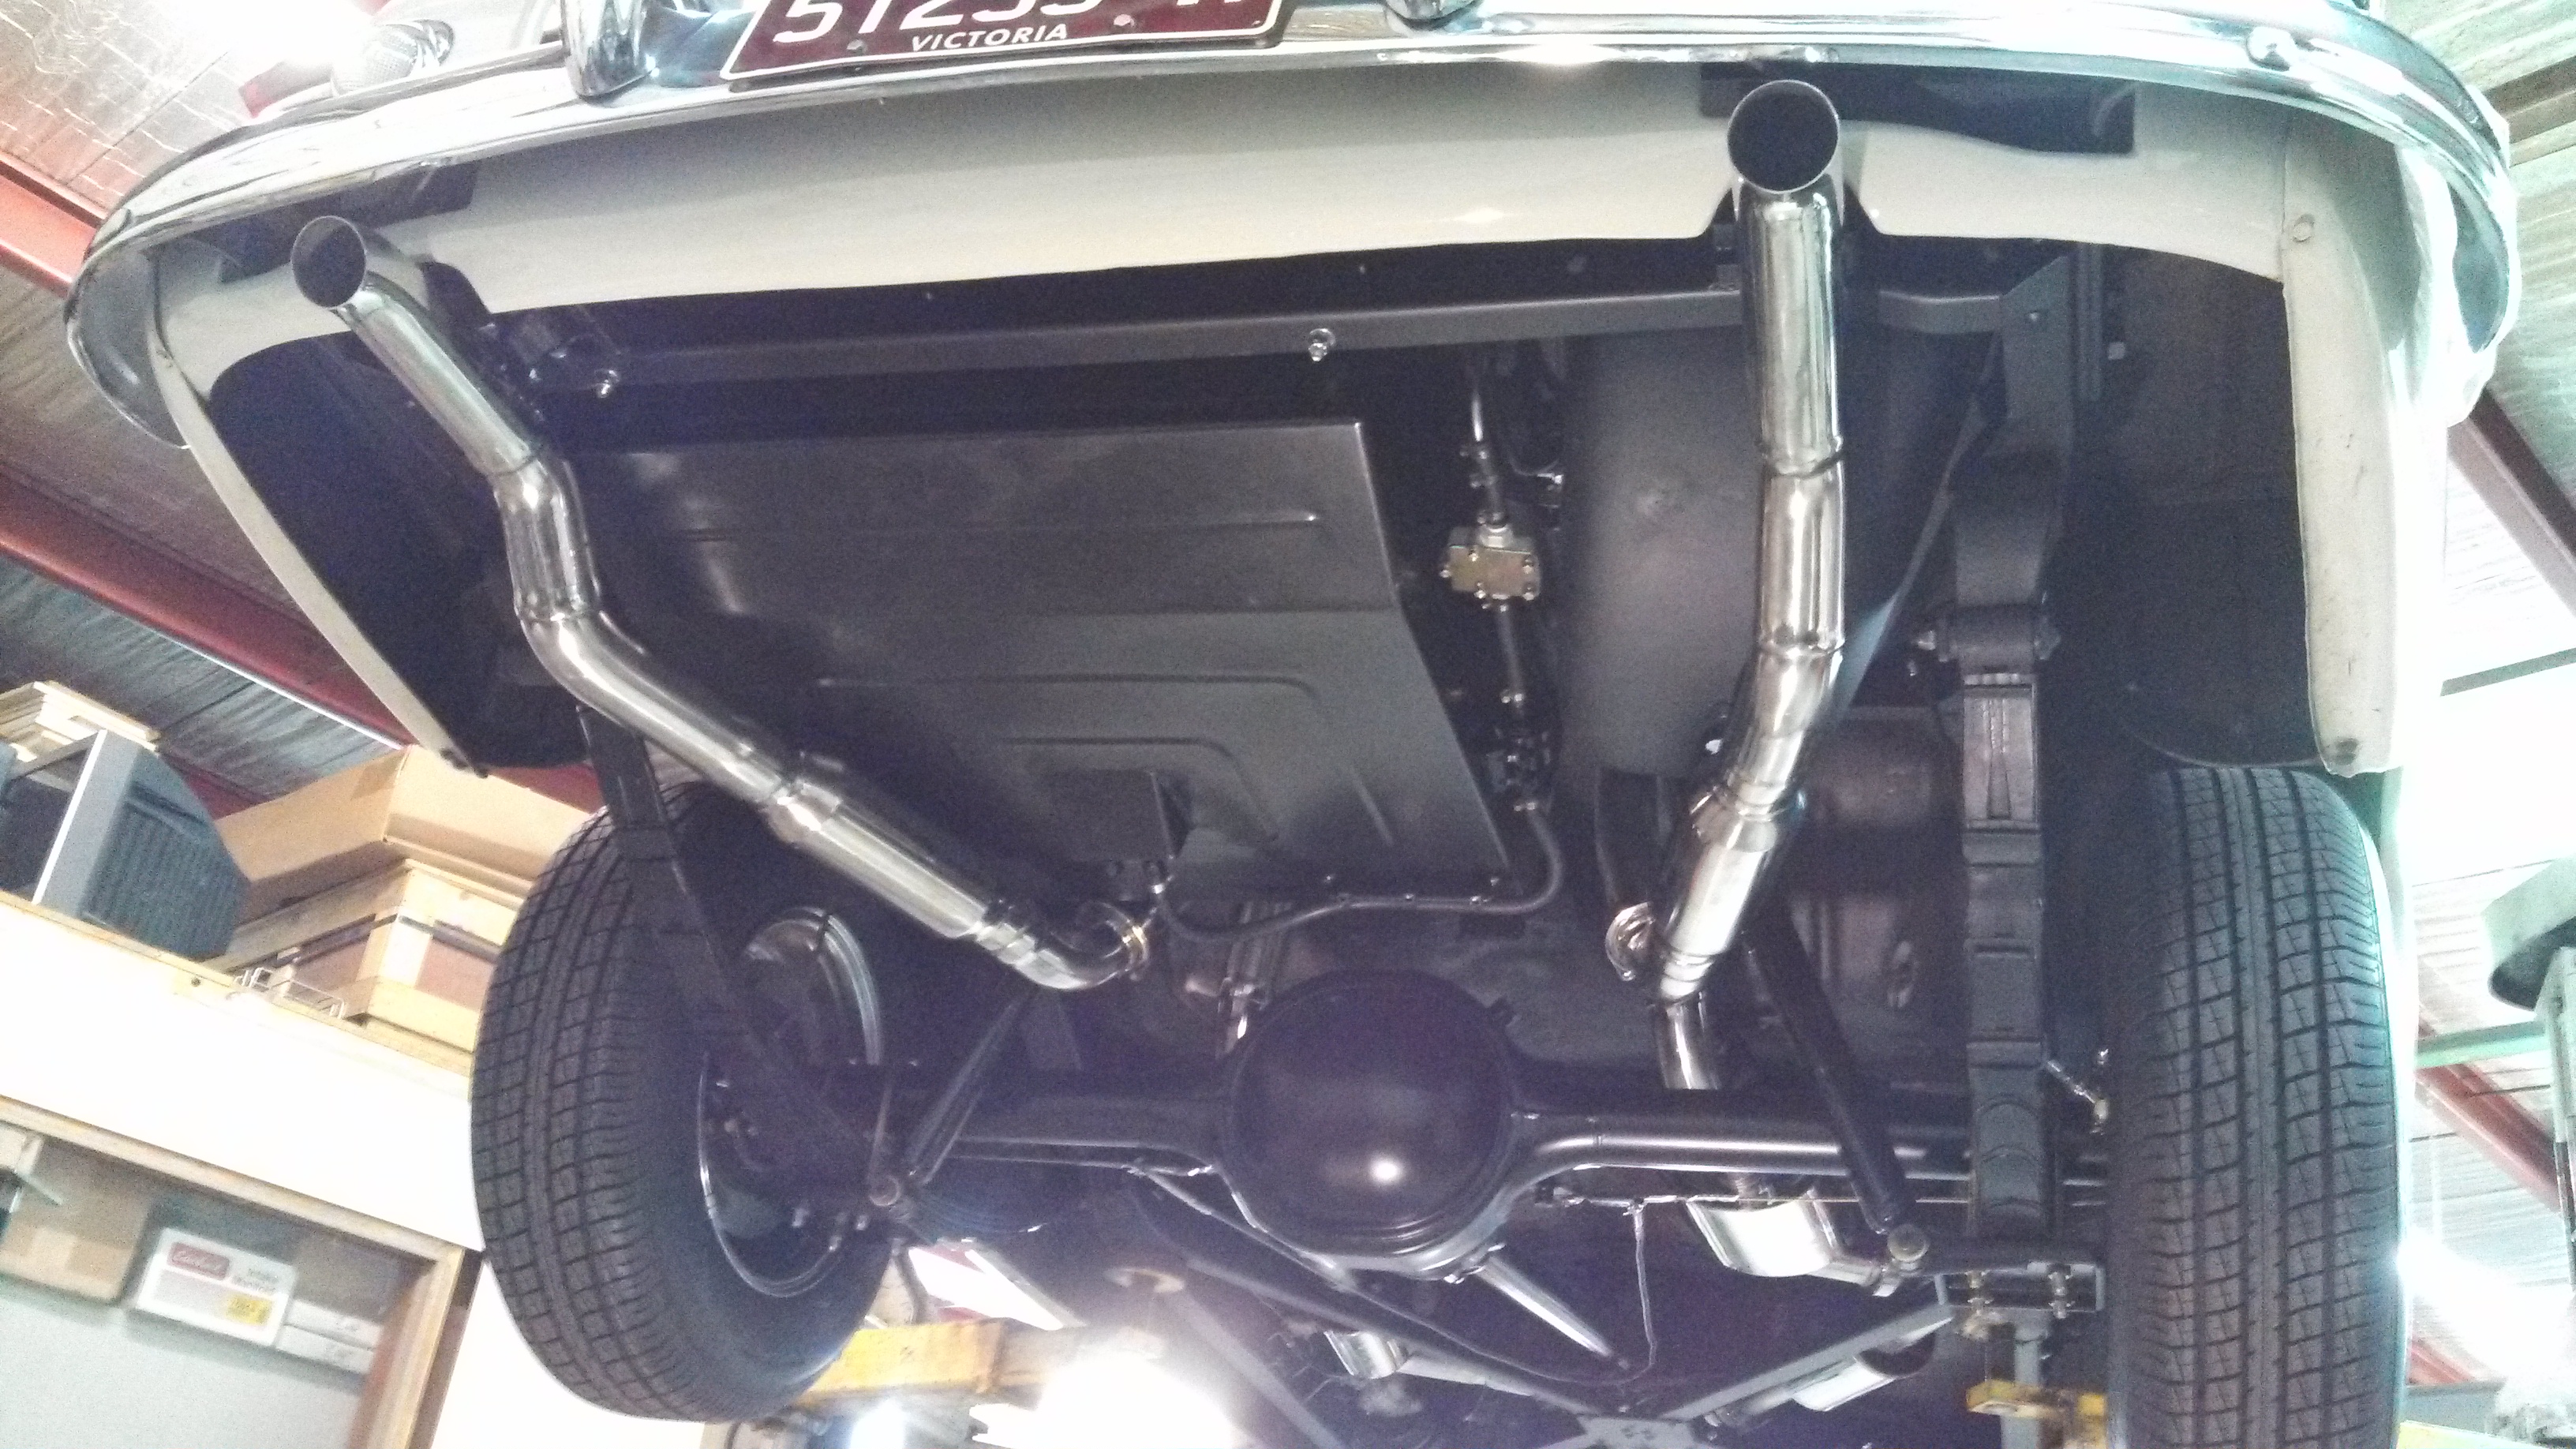
Hidden under this stock looking 49-50 Frod Mercury, Kustom Bitz has made up a 31 spline 9" diff with EL disc brakes and a tru track centre.  Custom extra capacity fuel tank was shaped to maximise the fuel capacity and in doing so gained an extra 40%, but it is all hidden within the body lines so you can't tell. Baffled with centre feed fuel well tank is powder coated black and lined.  Kustom Bitz 2.5" custom fitted stainless steel exhaust is fed by custom long tube try-y headers and runs four straight through mufflers and a pair of resonators with H pipe to keep the 351W high comp, big heads with roller cam engine under wraps while not restricting flow. You can find out more about this build by following our facebook page.

Custom made 50's style dash board top for the 1958 Morris J Type

 by kustombitz on 08 Jun 2017 |
No Comment
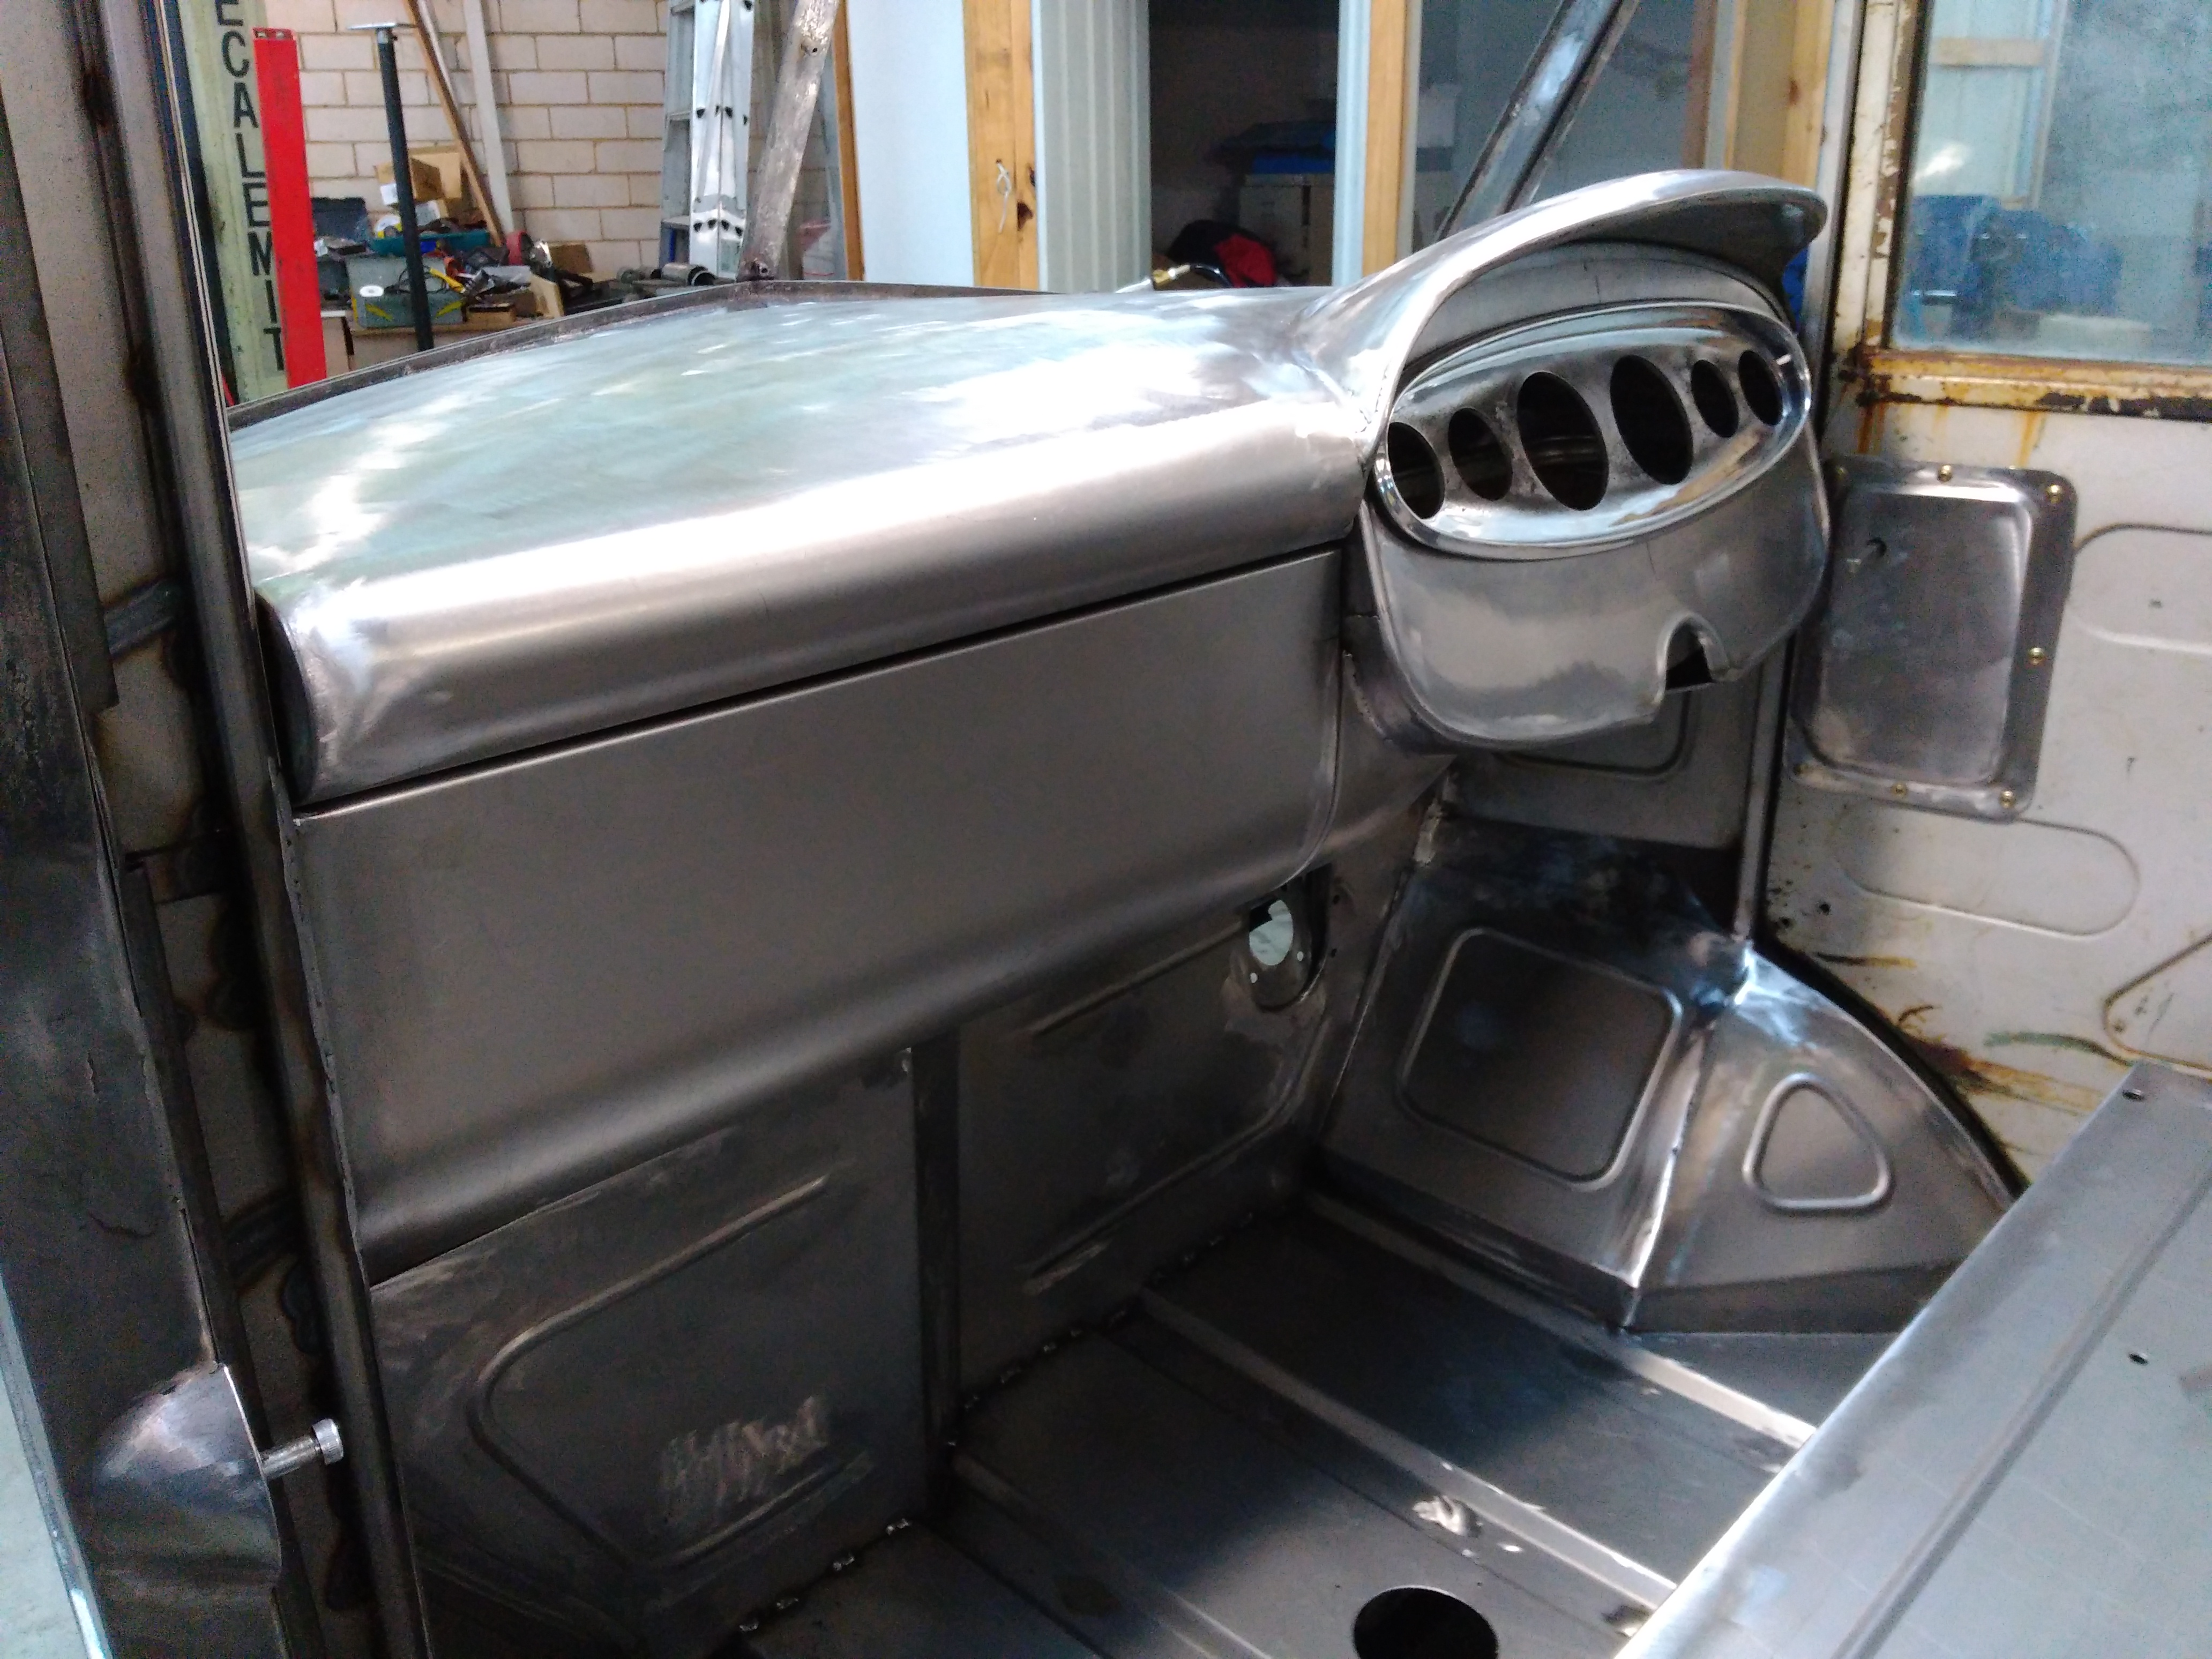
The Morris J type vans were never this fancy.  This one a 1958 model is a full custom build up. I wanted to capture that 50's style dash of the aussie and yankee cars of that era, even though the Morris never had a dash as such, it was more like a small turret with a steering wheel. An under dash brake booster and master cylinder is hidden behind all this too.

Hinged bonnet for a Morris J Type van and custom sheet metal lower panel

 by kustombitz on 11 May 2016 |
No Comment
The bonnet on a Morris J Type use dzues style fasteners, so it comes completely off.  They can be problematic, the paint chips around them and not to mention if the bonnet falls over and dents while its off.  So Kustom Bitz has, as part of our restoration of this old J type, made the bonnet hindge.  A custom made bonnet frame was made and the original bonnet skin was repaired and attached to our new bonnet frame.  This also meant a custom lower front panel had to be made also because of the bonnet shape, to allow it to open into a slight recess.  More pics can be found by following our Facebook page. 

Morris J Type Van front mud guard widened and rust repaired

 by kustombitz on 04 May 2016 |
No Comment
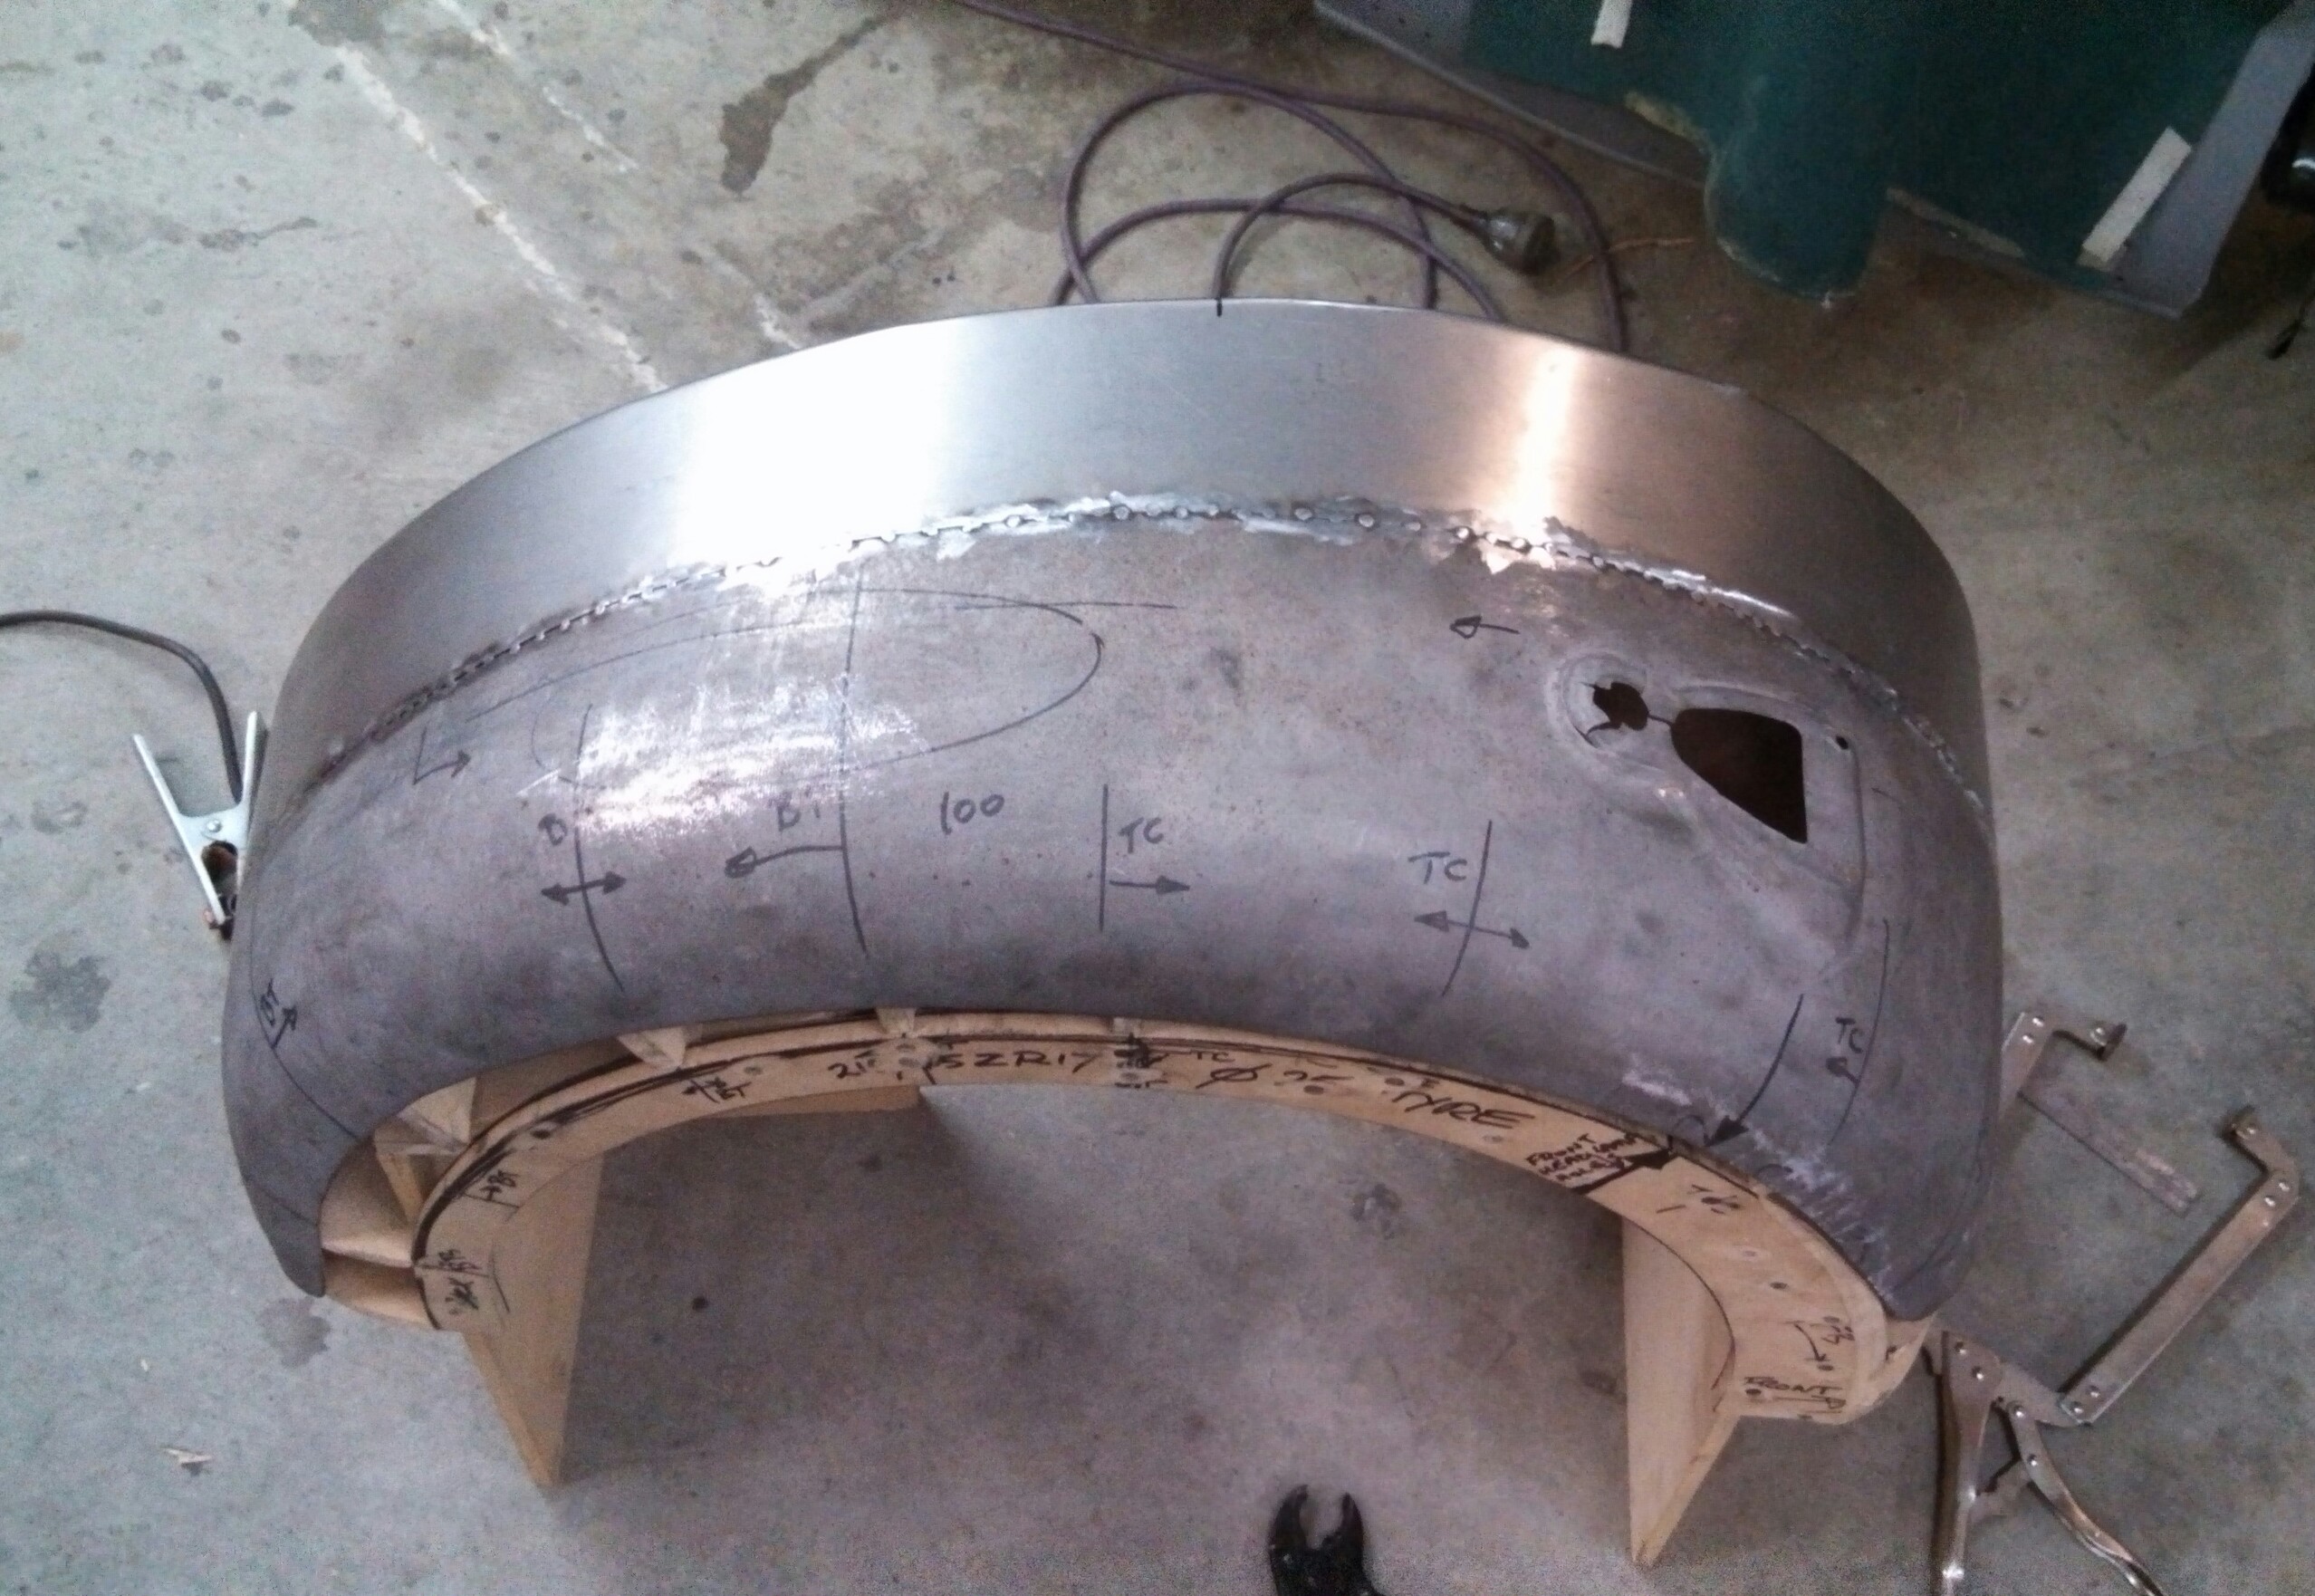
Kustom Bitz is currently restoring and modifiying a 1958 Morris J Type delivery van. Shown here is the wooden buck I made to be able to repair and shape the existing mud guard piece and widen it a little for fat tyres.  This mud guard has had more hits than the Beetles but I managed to work it back into shape so it can be used again. You just can't buy good guards for this model so that requires us to go the extra mile to make a properly fitting front pair of mud guards. To watch the build progress follow Kustom Bitz on Facebook. Click on the link in the top right corner of the web site.

Hot Rod interior fit up, custom dash board panel and trans tunnel

 by kustombitz on 22 Apr 2016 |
No Comment
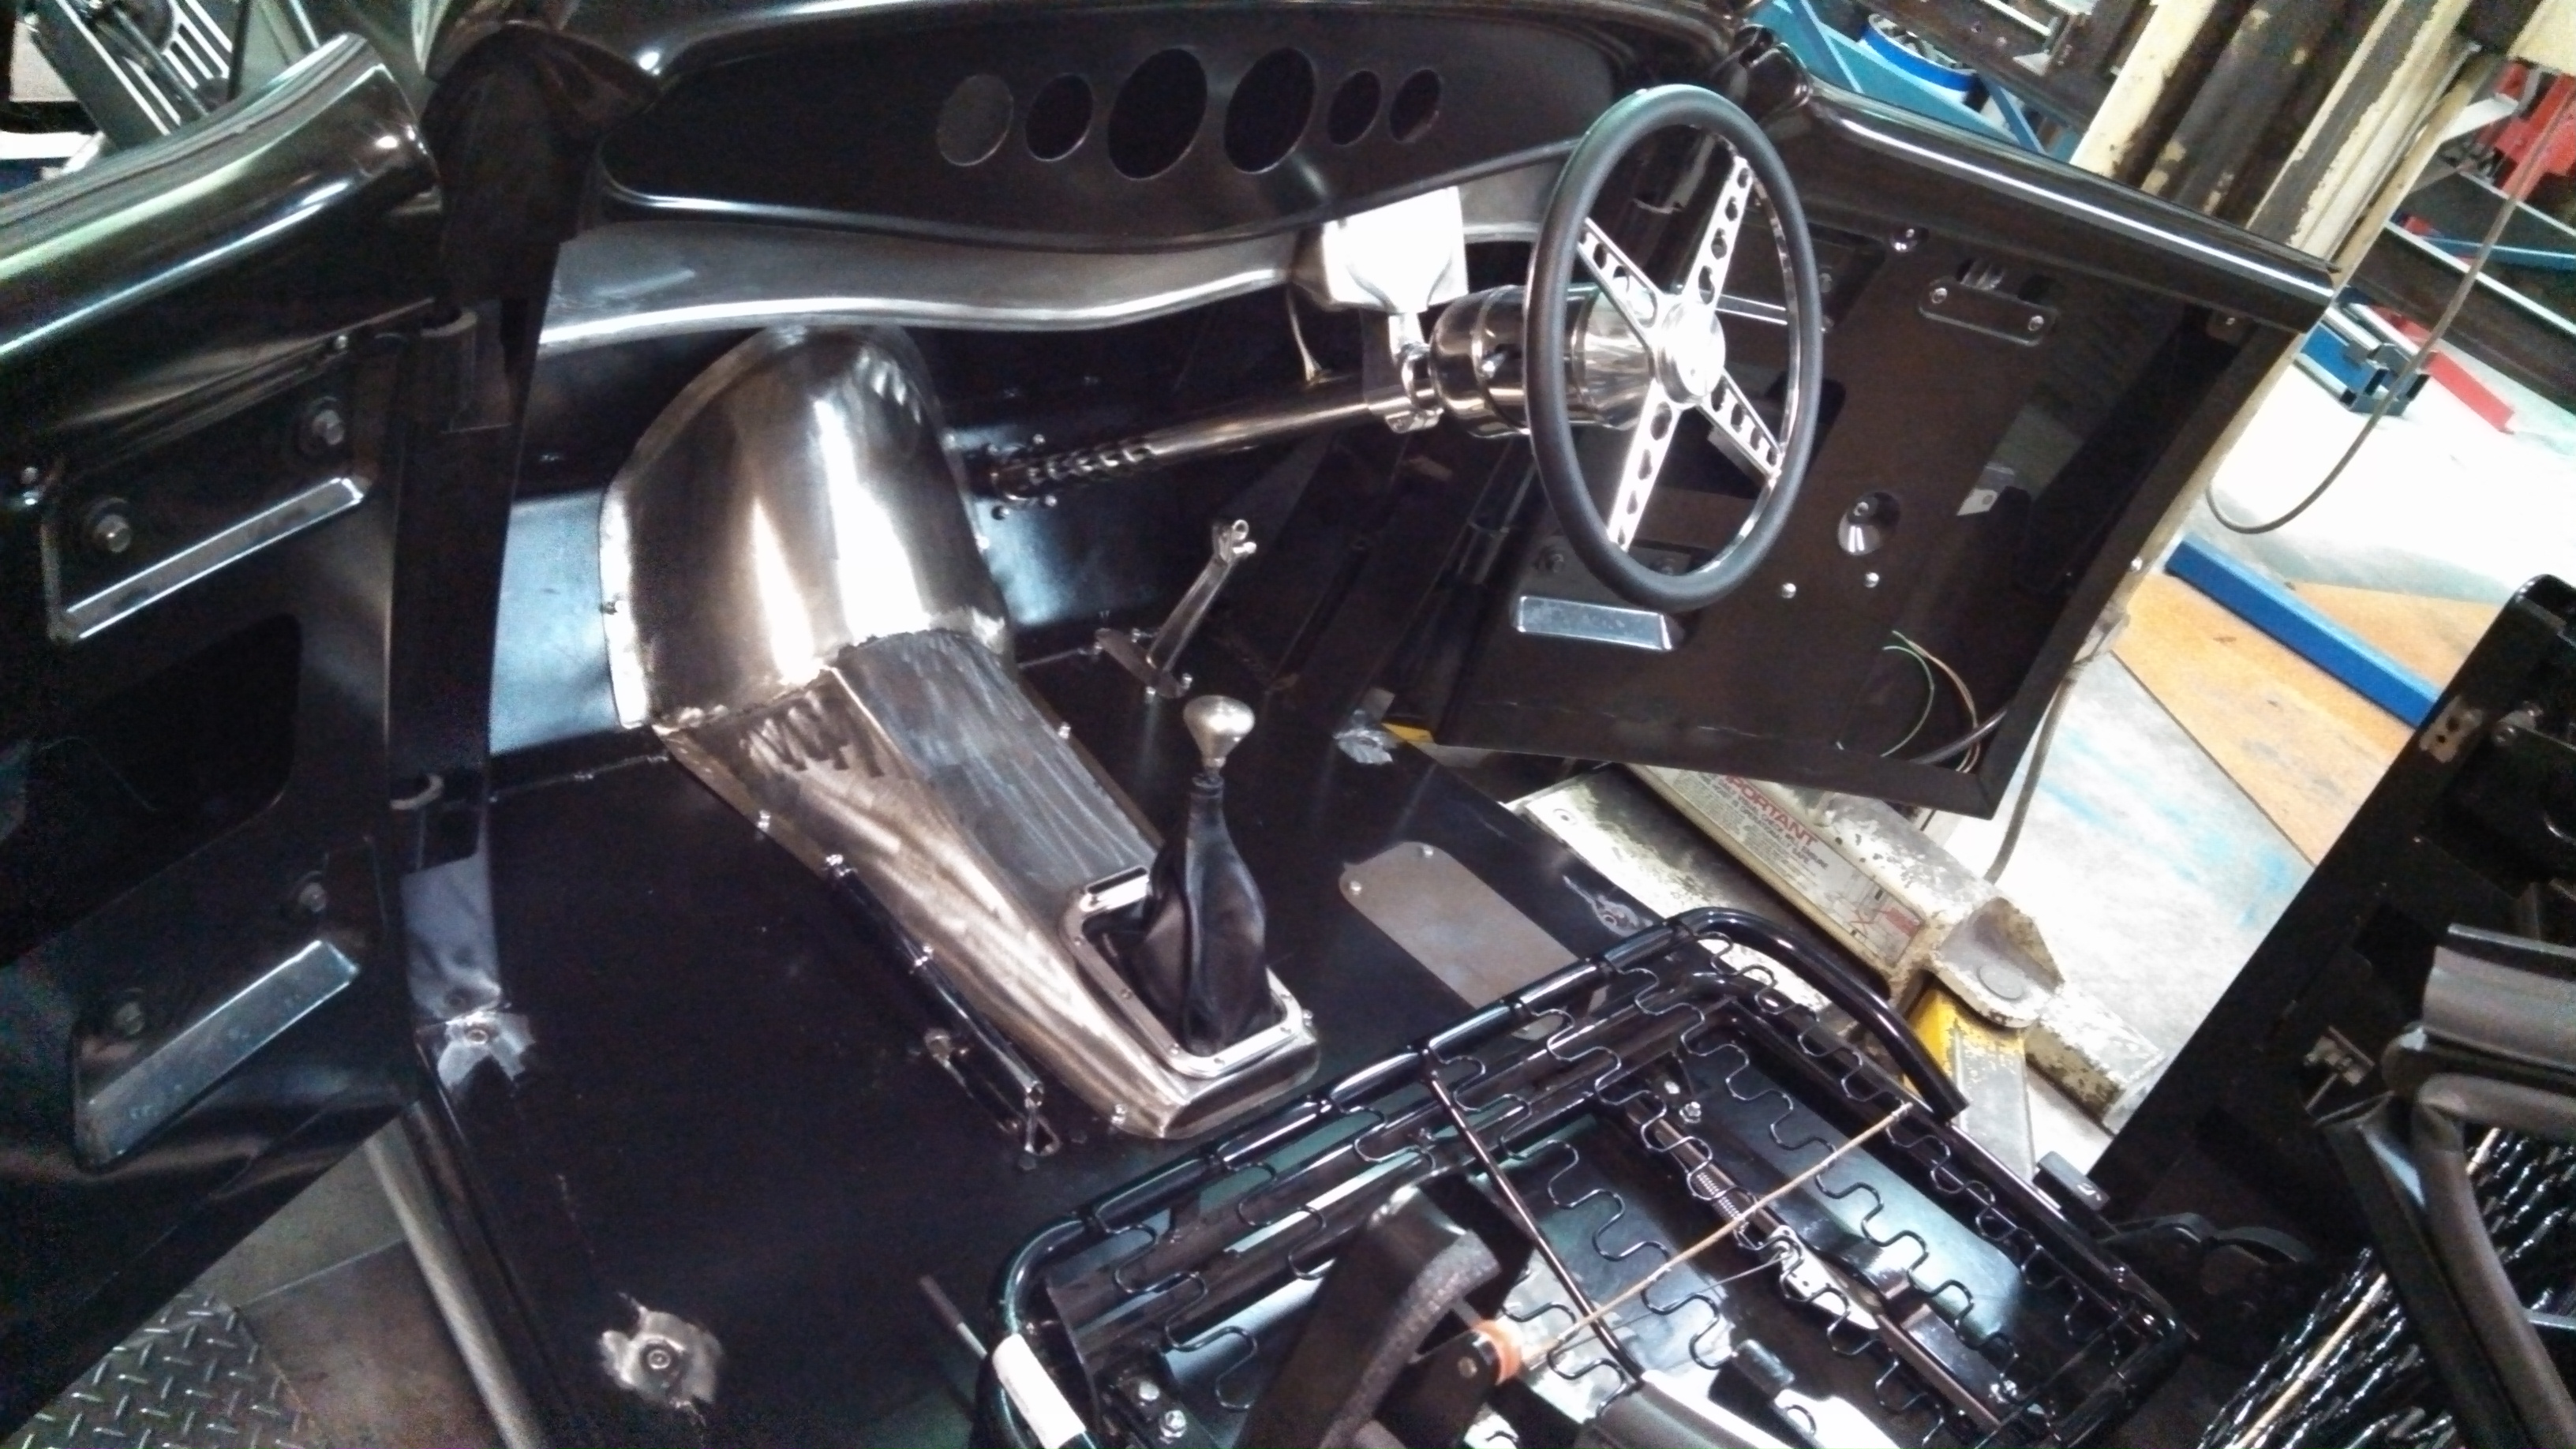
Show casing some of my workmanship on this 32 Ford Roadster interior. This is a Dearborn body, I have machined up and fitted bodyplugs for the chassis mounting bolts, a full height adjustable, tilt, flaming river steering column, custom formed up underdash panel for switches etc. Custom made trans tunnel that maximises feet and leg room in the cabin and incorporating a Lokar Products shifter.  Kustom Bitz brake booster master cylinder cover kit and one of our brake pedal rubber seal kits and I cut the holes in for the guages. Looking good.
Want to know more
Follow our workshop projects, new products, news and events on Facebook.
 
Kustom Bitz facebook page link
Site Navigation

Kustom Bitz news

EV conversion 1955 MG ZA Magnette by Kustom Bitz

by kustombitz on 04 Jul 2024
Kustom Bitz is doing an EV conversion on this 1955 MG ZA Magnette.  The job is a complete restoration and driveline conversion, it doen't look much at the moment but we have been pulling it apart to completely strip the paint for a full rotiserie restoration on the body.  The sills need replacing and the rear guards need some rust repairs but apart from that the body is mint. You can follow the restoration on https://www.facebook.com/MGEVMagnette We will be installing an air cooled Hyper9 AC motor and controller with two LFP battery packs, one in the boot and one in the front engine bay. The electric motor will sit in the gearbox tunnel with a Torque Trends USA Long tail housing reduction box, with integral park lock, like an auto trans has. The base EV technology that is going into this car has been around since the 1990s and I have been selecting, repairing and working on IGBT drive technolgy in the automation industry since that time, so combining my restoration skills and EV technology make sense to me. Intended as a city run around it should be a pretty stout combination as the Hyper9 puts out a similar torque to a stock 289 Windsor but from zero rpm all the way up. Rated at approx 200hp. The body is light weight at just on 1080kg stock, weight gets pulled out, engine and gear box [all cast iron], and the batteries is similar in weight so ends up around the same once finished.

41 Willys at Sydney Hot Rod Show 2024

by kustombitz on 04 Jul 2024
41 Willys coupe on display at the Sydney Hot Rod show, all bare steel body with a Kustom Bitz gasser modified chassis under it.

8:71 Supercharger install on 454ci powered '55 Chevy

by kustombitz on 30 May 2022
You would think a supercharger kit install would be pretty simple .... well no, is the short answer. A wise man once told me a 'kit' is not a solution.  And having worked on a few of these set ups now these words keep ringing in my head and I remember this old man who at the time I didn't think was that wise at all .... now I am older and I see.   In this install I had to port match the heads to the intake as there was a substantial lip into the head port because of the large intake manifold ports. If not corrected would have led to fuel puddling and fouled plugs and drivability problems that would have been hard to diagnose once assembled.  Also the distributor hole at the back of the manifold was off centre and way too big for a standard chevy dizzy and any aftermarket dizzy too. So I had to make a boss to take up the slack and provide a stable boss for the dizzy clamp to work properly.   To add to the woes, the engine assembler failed to pick up that it was a tall deck block and required a longer oil pump drive shaft .... that was hard to diagnose when a new engine loses oil pressure for no reason.   I got there in the end with modded accelerator links, better fuel line route, boost referenced carburettors and a proper harmonic balancer for a blower application.  The install was challenging on this one but the end result was a sweet running engine with monster amounts of torque to hall this heavy full size sedan around the hills .... and cool looks of course.  

41 Willys Coupe Gasser Chassis

by kustombitz on 30 May 2022
41 Willy Coupe chassis fabricated to original dimensions yet extra strength provided in the depth of the chassis and via tubular centre X member and many tubular cross members to take the weight and torque of a big block Ford drive line.  This chassis will have an original steel body fitted to it and the owner wants the whole car to resemble an early 60s drag car, right down to the rear radius rods that look like ladder bars, however it has to have nice street manners and pass ASRF construction guidelines for safe street rod engineering.  Now many may argue a leaf sprung front end and rear end is not the best handling street car and I would agree, but there are always trade offs for the look you want and the right combination of parts installed with the correct geometry can still yield a very nice driver with a really cool look.  When driven responsibly this 41 Willys will provide hours of enjoyment for the owner cruising around.   Chassis by Kustom Bitz [our custom designed rails], Engine Ford Hemi V8, T400 auto, 9" diff installed on leaf springs with diff housing floaters designed by Kustom Bitz for street use [so we have flexibility and suspension give], Super Bell front I beam with disc brakes cleverly mounted to parallel leaf springs without any mods to I beam and not relying on welded parts.   See our section on Hot Rod Chassis construction for more images of our various Willys Coupe chassis that Kustom Bitz has built.  

'67 Toyota Crown Ute - another air ride bagged project

by kustombitz on 01 Apr 2021
The Toyota Crown ute is progressing along, the body is fitting the modified original chassis and this is how it will look when it's dropped ... I think it has the right stance ... The framing you can see is holding the upper body together as the floor and lower sections are rusted away and have been cut out, then to be completely refabbed by us.  The frame allows us to lift the body on and off as we please during this stage.

1940 Ford Coupe chassis BBC 454 L80E 9" and air ride

by kustombitz on 01 Apr 2021
Kustom Bitz just completed a 35-41 chassis, stepped up at the rear and a reversed centre X member allow this chassis to sit 40mm off the deck. It runs a Rod Tech IFS, big block chevy and L80E auto, a 9 inch diff with floating hubs, all on modified original rails. Kustom Bitz has developed our own boxing plates that suit the original rails near on perfectly. Original Ford rails are curved from front to back there are no straight sections, so to get something that fits right we had to jig the chassis up and map them out.  This is what we do, when it just needs to be done right to make it a well engineered car.  This allowed us to make a nice transistion for a high step at the rear. We have designed in 6 inches of travel at the back, so this car can have a normal, almost stock ride height then dumped to the max when parked.

LS Engine swap and custom air bag IFS

by kustombitz on 19 Feb 2020
'67 Toyota Crown ute chassis build is going well. Got the LS engine and 6 speed manual box in place and we can use all the orginal serpentine pulleys, brackets etc. The narrow wheel track on the Toyota called for a tailored solution when it came to the front end.  These old Toyotas dont have service parts available any more so the front end had to be changed, so that made a brake upgrade alot easier too. We run R6 air bags from Air Ride sitting at a ride height of 6" for the air bag so got plenty of air volume in them for a good ride quality and a full length travel shock absorber so we get proper rebound tuning, along with a power steering rack.  So at the sill [belly of the car] we get a 5" ride hieght with a 4 inch drop, this thing will look great.

Double shear brackets - rear coil overs Hot Rod Chassis

by kustombitz on 30 May 2019
Recently in Victoria some engineers have called for the upper and lower mounts for the rear coil over shockers to be a double shear bracket.  The thoery is that the bolt has too much twisting force on it and it will break. Well thats why on Hot Rods we use a 5/8" grade 8 bolt in a single shear bracket application to over engineer it so it does not break. A typical OEM application uses a 1/2" bolt in a double shear bracket. However to please the engineer we have thought out a simple plate kit that can be welded in on the upper mounts as you see here to satisfy their requirements and should fit into most applications without too much effort or rework.  We have a lower mount bracket nutted out as well.

Diff bump stops custom made

by kustombitz on 08 Mar 2019
So many hot rod shops don't install proper bump stops.  In this instance we had to rebuild the shocker mounts on the diff as the rear end was bottoming out on the shocker travel becasue it had no properly designed bump stops in place. So the shock absorber mounting bracket was absorbing every bump when the suspension bottomed out, easy to see why both mounts broke. While we were repairing the diff I made a simple yet effective progressive bump stop that is held in place via the U bolts that hold the diff to the leaf springs. It turned out a very successful set up. This is yet another example how Kustom Bitz can sort out problems on your custom car or hot rod, its what we do.

Torana A9X custom made rear pan hard bar 9" Diff

by kustombitz on 08 Mar 2019
Back in the day Group C racing one of the tricks to get the Holden Torana to handle nice and be more predictable in corners was to fit a rear pan hard bar to give much better diff locating than the OEM triangulated 4 bars offered.  However the body, subframe and floor pan at the rear is no where near strong enoungh to concentrate the loads of pan hard bar in any one spot, so it has to be carefully planned and constructed, especially so in a street car like this that we cannot put a full roll cage in. You see in a race car I can place the roll cage in a position to pick up such loads placed on the pan hard bar brackets, but in this situaton we couldn't. The picture above is with the unit installed, keep in mind the car was just a shell so no weight was in it and the rear is sitting high. Once the full wieght of the car is on, it will sit fairly level.  It retains the original triangulated 4 bars however we run PU bushes in the bottom arms and ordinary rubber in the top arms. So the lower arms and pan hard bar do the locating and the top arms have some give so they don't bind with the pan hard bar.

© 2007 Kustom Bitz Pty Ltd. All rights reserved.